
So, you’ve just purchased a new retro handheld—congratulations! Maybe you’re looking to unlock its full potential by installing a custom firmware, or perhaps your existing SD card failed, and now your device won’t boot. It happens to the best of us. Whatever the reason, you’ve decided to install ArkOS, a popular and reliable custom firmware for retro gaming enthusiasts. This guide is here to help.

Whether you’re completely new to ArkOS or already familiar with the concept, this guide will walk you through everything you need to know. We’ll start with an introduction to what ArkOS is, its key features, and why it’s a great choice for retro handhelds. From there, we’ll move on to the installation process—step-by-step instructions to help you set it up on your device without any stress, and then to a complete ArkOS usage guide on your favorite handhelds.

If you’re worried about the technical side of things, don’t be. I’ll break down the steps in a way that’s easy to follow, even if you’re not particularly tech-savvy. As we go through the steps in this guide, I’ll include pictures, screenshots or animated GIFs from the actual process to help you follow along correctly and easily. By the end of this guide, you’ll have ArkOS installed and ready to go, along with pro tips on how to use it to get the most out of your retro gaming handheld.

Let’s begin with an overview of ArkOS—what it is, what makes it special, and how it can improve your device. Once we cover the basics, we’ll dive into the actual installation process. Ready? Let’s get started!

Table of Contents

Part 1 - Let Me Introduce about

ArkOS: A Reliable Custom Firmware

Before we get into the steps of installing ArkOS, let’s take a moment to understand why so many retro gamers trust it, and what it can do for you. Whether you’re looking to improve performance, add new features, or just make things easier to manage, ArkOS is worth a closer look. Let me walk you through it.

What Is ArkOS, and Why Use It?

ArkOS is a Linux-based custom firmware built specifically for retro handhelds. I know stock firmware can sometimes feel limited or frustrating, especially when you’re trying to get the most out of your device. That’s where ArkOS comes in—it’s designed to be more flexible, more functional, and ultimately, more enjoyable for people like you and me who love retro gaming.

Here are some of the key features that I think make ArkOS a great option for your newly purchased retro handheld:

    • Extensive Emulator Support: ArkOS can handle over 90 gaming systems, from classic consoles like NES to more demanding ones like Sega Saturn.
    • User-Friendly Interface: Thanks to the EmulationStation frontend, navigating your games and settings is quick and intuitive. You can also install, change, and configure themes easily.
    • Easy ROM Management: With support for FAT32 and EXFAT partitions, ArkOS lets you manage your ROMs by simply plugging your SD card into a Windows PC—no fuss, no hassle.
    • PortMaster Integration: If you enjoy modern indie classics like Stardew Valley or Celeste, you’ll appreciate that ArkOS supports over 500 PortMaster games.
    • Stable Sleep Mode: Most RK3326 devices with ArkOS like RGB10X or V10 have a reliable sleep mode, so you can pause your game and pick up right where you left off.
    • Media Features: Got a device with a higher-end chipset like RK3566? You can use ArkOS with Kodi to watch videos or stream YouTube right from your handheld.

ArkOS also has some neat tools for those of you who like to explore the technical side:

    • Web-Based ROM Management: You can upload and organize ROMs using your web browser over Wi-Fi—it’s super convenient.
    • Remote Access: For advanced users, features like SSH and Samba are available (disabled by default) if you need to access your device remotely.
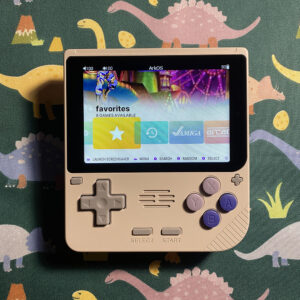
ArkOS on Powkiddy V10

Which Devices Does ArkOS Support?

One of the things I like about ArkOS is how many devices it works with. If you’re using one of these, you’re in luck:

    • Anbernic Devices: RG353V/VS, RG353M, RG351V, RG351MP, RG351P, RG353P/PS
    • Powkiddy Devices: RGB10X, V10, RGB30, RK2023, RGB20S
    • Game Console/DataFrog R36S, R35S, etc.
    • Others: Odroid Go Advance, Odroid Go Super

Now that you know what ArkOS is and what it can do for your handheld, it’s time to move on to the next step: installing it. Don’t worry—I’ll walk you through the entire process in the next part so you can get your device up and running with ArkOS in no time. Let’s get started!

Note: This tutorial is for a single-card setup. If you’re interested in a dual-card setup, there are some additional steps required after this process. I’ll cover those in a later section, so stay tuned. In this guide, I will freshly install ArkOS on my favorite Powkiddy RGB10X for demonstration purposes.

Part 2 - Let's Dive into How to

Install ArkOS in 8 Simple Steps

Step 1: Check Device Compatibility

The first thing you need to do is confirm that your retro handheld is supported by ArkOS. Refer to the supported device table here. If your device is listed, you’re good to go. If not, ArkOS might not work for you, and you’ll need to explore alternative firmware options. As from the list, my Powkiddy RGB10X is supported by ArkOS.

Step 2: Prepare a High-Quality SD Card

For the best results, use a branded SD card with good reliability like Sandisk, Samsung or Kingston. Generic or low-quality cards might cause issues during installation or while running ArkOS. It’s worth investing in a dependable card to save yourself from unnecessary frustration later.

Step 3: Gather the Necessary Tools and Software

Before downloading ArkOS, make sure you have the tools you’ll need to flash the firmware onto your SD card. Typically, this includes:

After downloading these software, go ahead and install them on your PC to use in the next step. If you’re not familiar with installing software on Windows, check this guide on installing 7-Zip. The portable version of Rufus doesn’t require installation—just download it, click, and run.

Step 4: Download the Correct ArkOS Version

Head to the ArkOS download page or check the download links table in my guide, grab the version that matches your device. It’s important to download the specific image for your handheld to ensure compatibility. In my case, I will download the image for the Anbernic RG351MP, as both my Powkiddy RGB10X and RG351MP use the same image. 

ArkOS Supported DevicesLatest Image Download Links
ANBERNIC
RG353MGDrive | Mega
RG353V, RG353VSGDrive | Mega
RG353P, RG353PSUse RG353M Image: GDrive | Mega
RG351 VGDrive | Mega
RG351 MPGDrive | Mega 
RG351P/RG351MMediafire
RG503GDrive | Mega 
POWKIDDY
V10, RGB10, RGB10s, RGB20GDrive | Mega
RGB10X, RGB20SUse RG351MP Image: GDrive | Mega 
RGB30GDrive | Mega
RK2023GDrive | Mega
GAME CONSLE/DATA FROG
R33S, R35S, R36S (from AeolusUX)

Original Screen - Google Drive | Mediafire | MEGA

Panel 4 (V5) - Google Drive | Mediafire | MEGA

OTHER DEVICES
CHIGDrive | Mega
OGA 1.0GDrive | Mega 
OGA 1.1GDrive | Mega

I have finished downloading the firmware image for my Powkiddy RGB10X, which uses the same image as the RG351MP. The downloaded file is named ArkOS_RG351MP_v2.0_09292024.img.xz. Now let's move to the next step.

Step 5: Flash the ArkOS Image onto Your SD Card

For the firmware flashing process, I’ll be demonstrating it on Windows 11 using Rufus as the image writing software. If you’re on a Mac, I recommend using BalenaEtcher, as it works well for this purpose.

The steps for flashing ArkOS to your SD card are quite similar on both Windows and macOS. However, in this guide, I’ll include pictures and screenshots specifically for Windows 11. I plan to update the guide with macOS instructions and visuals in a future update.

Extract The ArkOS Firmware Zipped File You've Just Downloaded

Once you’ve downloaded the ArkOS image for your specific device, the next step is to extract it using 7-zip or Winrar. On Mac, you can use The Unarchiver app.

    • Locate the zipped file you just downloaded. It should have a name similar to mine, such as ArkOS_RG351MP_v2.0_09292024.img.xz, starting with "ArkOS" followed by your device name, as shown in my example.
    • Right click on the file you downloaded and select Show more options => 7-zip => Extract Here (Or select WinRAR => Extract Here if you use WinRAR). Wait for the extraction process to finish, and you will receive a file with the .img extension at the end of its name. This is the ArkOS firmware image file we need, and it’s ready to be flashed onto your SD card.

Extract The ArkOS Firmware Zipped File with 7-zip

In my case, I extracted the zipped file and got a new file named ArkOS_RG351MP_v2.0_09292024.img. Your file name will be similar to mine, depending on what your device is.

Flash the ArkOS Firmware Image onto Your SD  Card

    • Insert your new SD card into the card reader and connect it to your PC.
    • Launch your flashing software. For Windows users, I recommend Rufus due to its reliability and effectiveness. If Windows prompts for permission to run Rufus, simply click Yes.
    • In the Device section, select your SD card as the target for flashing. Rufus automatically detects and displays only the SD card as the target, so there’s no risk of accidentally selecting your hard drive.
    • In the Boot Selection section, click SELECT and navigate to the ArkOS image file you extracted earlier. For example, I’ll choose ArkOS_RG351MP_v2.0_09292024.img
    • Click Start to begin the flashing process. Rufus will display a warning message indicating that it will format your SD card and erase all partitions. Click OK to confirm and proceed.
    • Wait for the process to complete, which typically takes about 3–5 minutes, depending on the speed of your SD card. For additional guidance, refer to the animated GIF below to ensure you follow the steps correctly.

Flash ArkOS image to SD card with Rufus

    • After the flashing process is complete, click Close to exit the Rufus application.
    • A partition named "BOOT" will appear on your SD card. Open your file explorer, locate the "BOOT" drive in the list of available drives, right-click on it, and select Eject to properly unmount your SD card.

Close the Rufus app and Eject your SD card safely

Step 6: Install ArkOS on Your Device

Important: Ensure your device is fully charged before installing ArkOS. On devices with two card slots, such as the Powkiddy RGB10X, you must use the first slot, usually labeled TF-OS or TF-1

    • After flashing, insert the SD card into your retro handheld and power it on. The device will automatically begin installing ArkOS, which typically takes 2–3 minutes. Simply wait for it to complete.
    • Once the installation is finished, the device will boot to the Home Screen, where you’ll see options like "All Games" or "Tools." Since no games have been added yet, the menu will appear mostly empty.
    • Now we turn off the device by pressing the Start button => Select Quit => Select Shutdown System (Press A button to select). After the device has completely powered off, we remove the SD card to proceed to the next step.

Step 7: Add Your ROMs and Necessary Files

Plug your SD card back into your computer. This is the time to copy over your game ROMs, BIOS files, and any other necessary content.

Important: If your Window PC ask you to 'Format' or 'Repair' you card when you insert it, select 'No' or 'Cancel' to turn off that promt.

Open File Explorer, and you’ll notice a disk named EASYROMS in your list of drives. Open it, and you’ll find a set of folders like bios, gba, nes, and snes. These folders are automatically created by ArkOS during the installation process to help you organize your ROMs and BIOS files easily. These are where you will place the required BIOS files and your game ROMs.

Transfer your ROM games and BIOS file to the correct folders on your game card

Add BIOS Files

A BIOS file is essential for retro handheld emulation, ensuring accurate game loading, saving, and rendering. Without it, some emulators or games may not work. BIOS files can be obtained by dumping them from your original console using a flashcard or specialized tools. On ArkOS, BIOS files must be placed in the EASYROMS/bios folder on your SD card to ensure compatibility and proper functionality.

Add Your Games

The EASYROMS partition contains folders for various retro systems. I’ll break down some of the most popular systems to help you understand where to place your games—just copy your games into the appropriate folders as guided in the following table. For more system folder structures, visit the official ArkOS GitHub page for detailed guidance.

SystemsRom Folder
Arcade (Final Burn NEO)arcade
Arcade MAMEmame2003
Nintendo Entertainment Systemnes
Super Nintendo Entertainment Systemsnes
Game Boygb
Game Boy Advancegba
Game Boy Colorgbc
Sega Dreamcastdreamcast
Sega Genesis - Master Systemmastersystem
Sega Genesis - Mega Drivemegadrive
Sega Saturnsaturn
PC Engine/TurboGraphx-16pce
Playstation 1psx
Playstation Portablepsp

Step 8: Boot Your Device Again and Start Playing

With your games loaded onto the SD card, insert it back into your device and power it on. ArkOS will boot up, and your games will be ready to play. Use the intuitive interface to browse, select a game, and dive into your retro gaming experience.

Unfamiliar with how ArkOS works? No problem! In the next section, I’ll walk you through navigating the system, selecting your favorite console, launching games, saving and loading your progress, and utilizing handy hotkeys. Let’s get started!

Part 3 - Firmware Installed, Next Let's Talk about

ArkOS Basic Using Guide

Now that you’ve successfully installed ArkOS on your device and likely loaded your own games, it’s time to boot up your handheld and explore! Let’s take a tour of the ArkOS interface and learn how to navigate it to play your games seamlessly.

Note: This section provides a very basic guide for beginners on using an ArkOS device. It includes steps for powering on the device, learning basic keys and functions, navigating the ArkOS system, playing games, and saving or loading game progress. If you're an experienced retro gamer looking for advanced tips and tricks, feel free to skip to the next section.

ArkOS Device Basics and Key Functions

Let’s get started with the basics of your ArkOS device. First, power it on by pressing and holding the Power button for 1–2 seconds. On vertical handhelds, the Power button is typically located on the sides, while on horizontal models, you'll usually find it on the top. You’ll see the ArkOS logo, and in a moment, it will take you to the Home Screen.

MENU, Navigation, Confirm/Enter and Cancel/Back Keys

Once you’re on the Home Screen, the first thing you should do is identify your MENU key. This button is typically labeled M, F, MENU, or FN and is usually located on the front of your device. It’s a crucial key for accessing system menus, performing shortcuts, and making adjustments.

Exceptions: On devices like the Powkiddy RGB V10 or RGB10X, the MENU key is the large minus () button located on the left side of the device's front face.

When navigating the ArkOS interface:

    • Use the D-pad buttons or left joystick as Navigation keys to move around.
    • Press A button to Enter or Confirm a selection, such as opening a system or starting a game.
    • Press B button to Go Back to the previous menu or screen, or to Cancel an action.

These keys form the foundation of how you’ll move through the ArkOS interface, making it easy to explore and manage your device.

Adjusting Volume & Brightness

To control the volume, press the Vol+ or Vol– buttons. They’re typically located on the sides of vertical devices or on the top of horizontal ones.

If you want to change the screen brightness, hold the MENU key and press Vol+ or Vol– at the same time. It’s a handy little shortcut you’ll likely use often.

Exceptions: On the Powkiddy RGB V10, which does not have dedicated Vol+ or Vol- buttons, to increase or decrease volume, hold the (+) button on the front face and press the D-pad Right or Left at the same time. Similarly, to adjust brightness, hold the (+) button and press the D-pad Up or Down simultaneously.

Shutting Down Properly

When you’re ready to turn off the device, press the START button, select Quit, and then choose Shutdown System => Yes. This ensures everything powers down safely.

Using Sleep Mode

For devices like the Powkiddy RGB10X (RK3326 or RK3566 models), you can put the device into sleep mode by lightly pressing the Power button.

Hard Reset and Shutdown – Use Only as a Last Resort

You might notice a small button labeled R near the Power button. This is the reset button. Use it only if your device freezes and won’t respond. Alternatively, you can hold the Power button for 3–5 seconds to perform a hard shutdown when necessary.

Get Familiar with the ArkOS User Interface

Let’s take a moment to get you comfortable with navigating the ArkOS user interface. It might feel a bit new at first, but I’ll guide you through it step-by-step so you can use it with ease.

When you boot up your device, you’ll land on the Home Screen. This is your central hub, where you can browse through different retro gaming console systems and collections, adjust settings, and access tools. The layout is designed to be simple and user-friendly, so you’ll quickly get the hang of it.

Navigating Through Console Systems & Collections in The Home Screen

On the Home Screen, you’ll see categories like NES, SNES, or GBA, depending on the games and files you’ve loaded. You might also notice collections such as All Games, Favorites, Recents, 2 Players, or Never Played. If these collections aren’t visible, it’s likely that ArkOS has turned them off by default. Don’t worry—this guide will show you how to enable them.

To navigate the console systems, use the D-Pad or joystick to scroll through the list. For a fun surprise, press the X button to randomly select a system. Once you’ve highlighted the system you want to explore, press the A button to open it.

On the Home Screen, you can also press SELECT to activate Screensaver mode or START to open the system’s main menu (I’ll talk more about this menu later). If you’re looking for a specific game, press the Y button to bring up the search function. Use the D-Pad and the confirm key (A button) to type the name of your favorite game and perform a search. A list of matching games will appear—simply highlight the game and press A to start playing.

Now, let’s get back to the console system you want to play. After selecting and entering a console system, you’ll see a list of games for that system. For example, I enjoy playing Game Boy Advance, so I selected it on my Powkiddy RGB10X. Here’s the game list for GBA games on my device. Let’s take a look!

Navigating Through Your Favorite Console Gamelist

Once you’re inside a system’s menu, you’ll see a list of games you added to your game card in the earlier section:

    • Use the D-Pad to scroll through the titles or L1 and R1 to quickly scroll through the list.
    • Press A to open and play a game.
    • Press X to randomly choose a game title.
    • Press Y to add or remove a game from the Favorite Collection.
    • Press SELECT to open options for the current console system, such as sorting the game list, editing metadata for the highlighted game, or changing its default core option.
    • Press START to access the ArkOS System menu from the game list.
    • To return to the console list, press B.

Now you’re probably super excited and ready to launch your favorite game by pressing the A button on the highlighted title. Yes, go ahead and do that! But before jumping in, let me tell you more about how your games run on ArkOS and the types of emulators it uses. Understanding this will help you get the most out of your gaming experience. Let’s dive in!

RetroArch vs. Standalone Emulators on ArkOS

RetroArch is a versatile platform that uses "cores" to emulate systems like NES, SNES, and PS1. Meanwhile, standalone emulators like PPSSPP for PSP or Dolphin for GameCube/Wii are designed for specific systems and often deliver better performance for demanding games. For a deeper explanation, check it in my ultimate beginner guide, where I’ve covered RetroArch and standalone emulators in detail.

ArkOS uses both RetroArch and standalone emulators, giving you the best of both worlds. While opening and playing a game might feel similar, certain features—like saving and loading your progress, using hotkeys for fast-forwarding or taking screenshots, applying cheats, or even exiting a game—work slightly differently between RetroArch and standalone emulators.

That’s why I’ve broken this down into smaller pieces of content: how to load and play RetroArch games, save and load your progress, and use handy hotkeys, as well as how to do the same for standalone emulators like PPSSPP and DraStic. Let’s start with RetroArch first!

RetroArch: How to Launch, Play and Exit Games

On ArkOS, classic systems like NES, SNES, Arcade games, Game Boy, Game Boy Color, Game Boy Advance, and even up to PlayStation 1, Dreamcast, or N64, default to using RetroArch.

Launch a Game

To start playing, continue from the game list of the console. Simply select a game, press A, and it will open using RetroArch. For example: I am now in the Game Boy Advance game list. I love enjoying Pokémon titles, so I will launch Pokémon Emerald by selecting it and pressing A.

Play a Game

Once you’re in a game, use the Start and A buttons to confirm and enter or start a new game.

    • On Arcade systems, press SELECT to insert coins before you can begin playing.
    • On systems like PS1, where the controller layout may be reversed for retro games, press B as the confirm button to start playing, A to go back or cancel.

While playing, here are some helpful hotkeys:

    • MENU + X: Open the RetroArch quick menu.
    • MENU + A: Pause the game.
    • MENU + B: Reset the game. If your game freezes or encounters an error/glitch (e.g., when loading save states or using cheats), resetting can help fix the issue. However, make sure you have a working save state or have already saved your progress in-game before resetting.
    • MENU + L2: Fast-forward your game. This is useful for skipping long dialogues or speeding through battle intros, such as in Pokémon.
    • MENU + Y: Take screenshots to capture your favorite moments.

Exit a Game

To exit any game running in RetroArch, hold the MENU key and press START twice. But before you quit your game, let’s learn how to save your progress—because we don’t want to start from scratch every time we launch it!

If you’re worried about forgetting to save your game, don’t worry—RetroArch also supports auto save states and auto load states. But that’s something I’ll cover in the advanced guide sections. For now, let’s focus on manually saving your progress first.

How to Save Your Progress in RetroArch

Manual Save (In-Game)

Use the game’s built-in save feature, just as you would on the original console. This method ensures compatibility with other emulators or systems. For example, in Pokémon Emerald, you can save in-game by pressing the START button, navigating to the save option, and selecting Save.

Save States (Quick Save)

RetroArch allows you to save and load "states," which are snapshots of your exact game progress.

A state slot in RetroArch refers to one of the multiple save slots available for saving and loading "states" of your game. Think of it as a virtual save file system where you can have several different save points for the same game.

Here’s how it works:

    • Each state slot acts as a unique save file. For example, if you're playing Pokémon Emerald, you can save in one slot before a gym battle and another slot after.
    • RetroArch provides multiple state slots (up to 999), which you can cycle through using MENU + D-Pad Up/Down.
    • When you save or load a state, RetroArch uses the currently selected state slot (default is slot #0).

You can use the following hotkeys to manage save states:

    • MENU + R1: Save a state in the current state slot.
    • MENU + L1: Load your previous save state from the current state slot.
    • MENU + D-Pad Up/Down: Change the current state slot to manage multiple save points.

If you don’t like using hotkeys, you can save and load states through the RetroArch Quick Menu:

    • Open Quick Menu: Press MENU + X in-game.
    • Select State Slot: Choose the desired slot number.
    • Save or Load State: Select Save State or Load State to manage your progress.

This menu-based method is perfect for those who prefer a visual approach!

Backup Your Progress

If you're trying new settings, cheats, or anything experimental, always make a save state or a manual in-game save before proceeding. This ensures you can revert to a stable point if something goes wrong. It’s a simple precaution that can save you a lot of frustration!

By combining manual saves, save states, and backups, you can ensure your progress is always safe and ready to resume whenever you like.

Play Games with Stand-alone Emulators: PPSSPP and Drastic

Now let’s talk about stand-alone emulators. I’ll cover PPSSPP for PSP games and DraStic for NDS games on ArkOS. To launch a PSP or NDS game, it’s the same as RetroArch: Navigate to the PSP or NDS console on the home screen, pick a game from the list, and press A to start.

Note: I’ll cover other stand-alone emulators, like Flycast (for Dreamcast games) and YabaSanshiro Stand-alone (for Sega Saturn games), in a future update.

How to Use PPSSPP to Play PSP Games

When you are in the game, use the A and B buttons to navigate. Note that for PSP systems, the key layout might differ slightly: A = Circle (back), B = Cross (confirm), X = Triangle, and Y = Square.

To open the Quick Menu in PPSSPP, press the MENU key or click R3 (the right joystick). In the Quick Menu, you’ll find 5 state slots (#1 to #5). To the right of these slots, you’ll see the Save State option. Once you save a slot, a screenshot of that state will appear, along with a Load State button, allowing you to load that state whenever needed. From this menu, you’ll also find options like Settings and Cheats, but those are for advanced guides later.

To exit the PPSSPP emulator, you can either choose Exit to Menu => Exit from the Quick Menu or simultaneously press START and SELECT.

How to Use Drastic to Play NDS Games

Let’s talk about how you and I can use DraStic to enjoy NDS games to the fullest. DraStic comes with intuitive controls that make interacting with the Nintendo DS’s unique dual-screen setup smooth and simple. Here’s a quick breakdown of how it works:

Controls for Playing NDS Games in DraStic
    • R2: Swap Between the Upper and Lower DS Screens. The Nintendo DS has two screens: the upper screen for viewing gameplay and the lower screen for touch controls. Press R2 to switch the positions of these screens, making it easier to focus on either the upper or lower screen depending on your preference or the game’s needs.

    • L2: Toggle Between Dual-Screen and Single-Screen Views. DraStic allows you to switch between viewing both screens (dual-screen mode) or focusing on just one (single-screen mode). Press L2 to toggle between these views, which is particularly useful if the game requires more attention on one screen or if you want a cleaner, larger display.

    • L3: Click the left joystick (L3) to open the DraStic menu, where you can access options like Save State and Load State.
    • Right Joystick: Move the Stylus. The right joystick acts as a virtual stylus, simulating touch input for games. Move the joystick to guide the stylus on the lower screen. This is essential for games that rely heavily on touch controls, like puzzle games or interactive menus.

    • R3: Stylus Tap. Click the right joystick (R3) to simulate a tap with the stylus. This function lets you interact with the touch screen, such as selecting menu options, solving puzzles, or performing touch-based gameplay mechanics.

    • To exit the emulator, use the DraStic menu or simultaneously press START and SELECT.
How to Save Your Game in DraStic

Now, let’s make sure you don’t lose your progress. DraStic offers two main ways to save your game, so you can choose whichever works best for you:

    • Using Save State/Load State. If you’re familiar with RetroArch or PPSSPP, this will feel similar. You can open the DraStic menu (press L3) and use the Save State and Load State options. It’s as simple as selecting a save slot and saving or loading your progress as needed.

    • In-Game Saving. Most NDS games include a built-in save feature. You can use this just like you would on the original DS. This method ensures that your save file is compatible with other systems or emulators if you ever switch devices.

Either method works great, but I’d recommend using both if you’re trying out new settings or cheats, just to be extra safe.

Note: Because ArkOS uses a default version of DraStic, on some devices that lack joysticks or L3/R3 buttons, such as the Powkiddy V10 and RGB10X, you might not be able to open the DraStic menu to save or load states. In such cases, your only option to save progress is by using the in-game saving feature. Additionally, games that rely heavily on stylus touch interactions may not work properly on these devices, as there’s no way to simulate the stylus move or tap functionality. Keep these limitations in mind when playing on these devices.

There is a newer version of DraStic from Steward-Fu that allows you to easily emulate the stylus function on devices without joysticks, such as the Miyoo Mini Plus. However, this version is integrated into Onion OS and other custom firmware and is currently not available on ArkOS. If this feature becomes available in a future update, I will make sure to update this guide accordingly.

ArkOS Global, RetroArch and Stand-alone Emulator Hotkeys Summary

Now that you’ve learned the basics of your ArkOS device—key functions, navigating through system views, and launching RetroArch or stand-alone emulator games—you’ve also encountered several handy hotkeys along the way. To make things simple, I’ve summarized all the essential hotkeys in a table. If you forget any of them later, this table will serve as a quick reference. Below is the complete hotkey table for your convenience.

HOTKEYSFUNCTIONSWhere/When to Use
GLOBAL KEYS
D-pad buttons or Left joystickNavigationAll Applications
AEnter / ConfirmAll Applications (In PSP & PS1 eumlator, A is Back/Cancel)
BBack / CancelAll Applications (In PSP & PS1 emulator, B is Enter/Confirm)
Vol+Increase volumeAll Applications
Vol–Decrease volumeAll Applications
MENU + Vol+Increase brightnessAll Applications
MENU + Vol–Decrease brightnessAll Applications
STARTOpen ArkOS System MenuHome Screen, Console Game List
SELECTEnter Sreensaver ModeHome Screen
Insert CoinsIn Arcade Games
Open Console Option MenuConsole Game List
YAdd/remove a game to/from Favorite CollectionConsole Game List
Search for a gameHome Screen
XRandomly select a system or a gameHome Screen, Console Game List
RETROARCH HOTKEYS
MENU + XOpen the RetroArch quick menuRetroArch Games
MENU + APause gameRetroArch Games
MENU + BReset the gameRetroArch Games
MENU + L2Fast-forward your gameRetroArch Games
MENU + YTake screenshotsRetroArch Games
MENU + STARTQuit gameRetroArch Games
MENU + R1Save a state in the current state slotRetroArch Games
MENU + L1Load your previous save state from the current state slotRetroArch Games
MENU + D-Pad Up/DownChange the current state slotRetroArch Games
DRASTIC, PPSSPP STAND-ALONE EMULATOR, PORTMASTER
R2Swap Between the Upper and Lower DS ScreensNDS Games
L2Toggle Between Dual-Screen and Single-Screen ViewsNDS Games
L3Open the DraStic menuNDS Games
R3Stylus TapNDS Games
Right JoystickMove the StylusNDS Games
START + SELECTQuit Drastic, PPSSPP and PortMaster GamesNDS, PSP, PortMaster Games
MENUOpen PPSSPP Quick MenuPSP Games
Powkiddy V10 Additional Hotkeys
+ and D-pad Right or LeftAdjust volumeAll Applications on Powkiddy V10
+ and D-pad Up or DownAdjust brightnessAll Applications on Powkiddy V10

Next, we’ll explore the ArkOS menu system, where you’ll learn how to customize settings such as system language and sound, scrape game images and metadata via Wi-Fi, and perform OTA updates to keep your device up to date. These features will help you get the most out of your ArkOS device.

Exploring the ArkOS System Main Menu

The ArkOS System Menu offers a variety of features to help you personalize and optimize your gaming experience. To access this menu, simply press the START button while on the homescreen or in a console game list. This will open up a world of customization options tailored to your preferences.

Note: This menu contains numerous options to customize and optimize your ArkOS device. However, in this guide, I have only listed some of the most popular and essential features that beginners will find useful for their daily use. For more advanced options and deeper customization, refer to the ArkOS Advanced Guide sections for detailed instructions.

Display Settings and Info

One of the first options you'll encounter is the Display Settings and Info, where you can adjust your screen brightness for comfortable viewing

UI Settings

In UI Settings, you can personalize your device’s appearance by switching between themes to give it a fresh look. ArkOS comes with a few default themes, and if you’d like to explore more options, instructions for adding additional themes are included in a later section.

For further customization, the Theme Configuration allows you to adjust settings such as the gamelist view style (basic, video, detailed, or grid), the default grid size (if using grid view), and theme colors. Depending on the theme you’re using, these configuration options might vary, offering more or fewer settings to tweak.

You can also modify the UI Mode, switching from Full to Kid or Kiosk Mode. This is particularly useful if you’re handing the device to a child or a friend and want to restrict access to system settings. Kid Mode or Kiosk Mode will limit or completely disable access to the system menu, ensuring your settings remain untouched.

Additional options include changing the transition style or game launch transition, toggling the visibility of the clock and battery status, and enabling or disabling features like the game search/filter function. These settings give you full control over how the interface looks and behaves, tailored to your preferences or specific needs.

Sound Settings

Sound Settings allow you to change the system volume or toggle the frontend (background) music on or off. Although ArkOS doesn’t include background music by default, you can add your own tracks, and some themes even include navigation sounds, which you can disable if desired.

Game Collection Settings

This is where you can manage and organize your games. You can enable automatic collections, such as "All Games," "Favorites," or "Last Played," or even create your own custom collections, such as "Best Pokémon Games" or "Top Shooting Games".

Emulator Settings

This section lets you adjust settings for specific console systems, including switching between RetroArch or stand-alone emulators. You can also change the Core to one that provides better support or performance.

For example, if you want to trade Pokémon or battle with a friend in Pokémon Emerald, you’ll need to set the GBA Emulator from Auto to RetroArch or RetroArch 32 and select the GPSP Core. For systems that require less power, like NES or SNES, you can set the Governor to Powersave to conserve battery. However, for more demanding systems like PSP or N64, it’s better to use Performance mode for smoother gameplay.

Scraper

The Scraper feature allows you to download game box art and metadata directly onto your device using WiFi. To get started, ensure your device supports WiFi and is connected to the Internet. You can then choose where to scrape from: Screenscraper (requires an account) or TheGameDB (no account needed). Select the image type you prefer, such as screenshots, box2D, or box3D. If you’re using Screenscraper, be sure to enter your username and password. Once everything is set, simply click Scrape Now.

Keep in mind that this method works best for smaller game libraries due to the limitations of free accounts. If you have a larger library or want advanced customizations, like scraping gameplay videos or using specific image sizes, it’s better to bulk scrape manually on a Windows PC using the Skraper App. Don’t worry—I’ve put together a detailed guide to walk you through the process.

Advanced Settings

This menu offers options to adjust your timezone, controller layout, and power button functionality.

    • Timezone: Select your time correct timezone and you connect your device to WiFi to automatically update the date and time
    • Switch the A/B button EmulationStation: This allows you to switch the A/B button layout to mimic Xbox or PlayStation controllers. If you’d like the power button to turn off the device rather than putting it to sleep, you can change that setting here as well.
    • Additional options include changing the system language and showing framerate statistics to monitor game performance.

Quit

Finally, the Quit Menu provides options to safely restart or shut down your device. At the bottom of the system menu, you can always check key indicators such as your battery level, WiFi status, and the current ArkOS firmware version.

Now that you have a better understanding of the ArkOS system menu and some of its essential options, it’s time to explore some helpful user tips and recommendations. These tips will enhance your experience and make everyday tasks smoother. Afterward, we’ll wrap up with the advanced ArkOS guide in the final section for those who want to dive deeper into customization and optimization.

Part 4 - Don't Forget These Essential

User Tips & Recommendations

Using a Powkiddy RGB10X or other awesome retro handhelds with ArkOS? Here are some practical tips and recommendations to enhance your experience and keep everything running smoothly. Let’s dive into the first tip.

Enable Recent and Favorite Collections

To quickly access your most-played games, enable the Recent and Favorite collections in the system menu. This feature organizes your go-to titles into dedicated sections, making them just a click away for convenient gameplay.

To do this on ArkOS, enter the System Main Menu, select Game Collection Settings, go to Automatic Game Collections, and check the options for Favorites and Last Play.

Here you can also enable additional collections, such as 2 or 4 Players, Never Play, or even combine all your arcade game console systems into one unified Arcade Collection for easier browsing.

Always Have an In-Game Save When Using Cheats or Auto Save/Load States

When using cheats with RetroArch, always save your progress in-game before applying them. This ensures you can recover your progress if anything goes wrong, like a crash or unintended effect caused by the cheat.

Additionally, if RetroArch Auto Save/Load State is enabled on your device, be cautious when loading previous states. Sometimes, an auto-save state may encounter errors or overwrite a state you didn’t want saved—for example, if you accidentally miss catching a legendary Pokémon. To avoid such issues, it’s a good habit to maintain manual in-game saves alongside auto-save states.

Use the Power Button for Quick Sleep

The power button is a convenient way to instantly put your device into sleep mode. This feature is perfect for taking quick breaks during gameplay and helps conserve battery life without needing to fully shut down the system. Simply press the power button, and your device will be ready to resume exactly where you left off.

Use a Dual-Card Sytem Setup on ArkOS

A dual-card setup is secure and convenient. Install the firmware on the first card and use the second card for game storage. This approach allows easy game library transfers between devices and simplifies recovery if the firmware card fails—just replace the first card, reinstall the firmware, and your game card stays intact and ready to use.

Here’s a step-by-step guide to set up a dual-card system on ArkOS for better organization and flexibility:

Step 1: Install ArkOS on the First SD Card (Firmware Only)

Note: If ArkOS is already running on your device, you can skip this step and move to the next one.

Step 2: Insert the Second Card for Game Storage

    • Insert your second SD card into the second slot, often labeled as TF-GAME or TF-2.
    • Boot your device again.

Step 3: Configure the Device to Use the Second Card for ROMs

    • Once the device boots, navigate to the OPTIONS category on the Home Screen (usually after the PORTS game collection).
    • Select Advanced, then choose Switch to SD2 for ROMs.
    • Let the script run. Once completed, the device will reboot, and the second card will now be used for storing games, while the first card remains for firmware only.

Note: If your first system card already contains a lot of games, the migration process from SD1 to SD2 may take some time. Please be patient and wait until it completes.

Step 4: Transfer Games and BIOS to the Second Card

    • Turn off the device, safely remove the second card, and connect it to your computer.
    • Transfer your game and BIOS files to the second card as outlined in Step 7 of the ArkOS installation process from the previous section.
    • Once your files are copied, insert the second card back into the device, boot it up, and start enjoying your games.

This dual-card setup keeps your firmware and game data separate, making it easier to manage and recover in case of any issues.

Extend Your Device Battery Life

Let’s talk about some simple yet effective tips to help you conserve battery life, so you can enjoy longer gaming sessions on your ArkOS device.

Turn Off Background Music or Navigation

Disabling background music and navigation sounds can help reduce power usage. To do this, open the System Main Menu, go to Sound Settings, and turn off both Frontend Music and Navigation Sounds. This simple tweak can make a noticeable difference.

Change System Performance Governor on Low-Demand Systems

By default, ArkOS sets the Performance Governor for all console systems to ensure optimal performance. However, for less demanding systems like NES, SNES, GBC, GBA, or Mega Drive, you can switch to Power Save mode. This helps conserve battery life while still delivering great performance for these systems.

To make this change, go to Emulator Settings in the ArkOS system menu. Select the emulator for NES, SNES, or GBA, and set the Governor to Power Save. This simple adjustment strikes a balance between efficiency and functionality on your device.

Using the Auto Suspend Function

If you’ve ever been interrupted while gaming—maybe by a phone call or something urgent—you might forget to turn off your handheld device. Leaving it running while you’re not playing can drain the battery unnecessarily. Thankfully, there’s a simple solution: enable the Auto Suspend feature.

By default, ArkOS has this feature turned off, but you can easily activate it by following these steps:

    • Open the System Main Menu.
    • Navigate to Advanced Settings.
    • Turn on Auto Suspend Timeout, and choose your preferred time—5, 10, or up to 60 minutes.

This way, your handheld will go into sleep mode automatically when left idle, helping you save battery life. Keep in mind, auto suspend only puts your device into sleep mode, not a full shutdown. If you’re done gaming for the day, turning it off completely will conserve even more battery.

Think of your handheld as a mini Linux PC. Sleep mode works well, but it’s not as battery-efficient as modern smartphones. If you leave the device in sleep mode overnight or for several days, the battery might drain completely. When that happens, the device won’t boot until recharged, which might make you think it’s bricked. Enabling auto suspend is a handy way to save battery during breaks, but for longer periods, powering off completely is the best choice.

By following these three tips, you can extend your handheld’s battery life and enjoy longer gaming sessions.

Shut Down the Device Correctly to Avoid Data Loss

To safely shut down your device, always use the Quit option in the system menu. Avoid using a hard reset or hard shutdown unless your device is frozen or unresponsive. This practice helps prevent potential data loss or corruption, ensuring your system stays reliable and your data intact.

These simple yet effective tips can enhance your experience and help you use ArkOS more efficiently. If you're interested in more user tips and advice on using retro handhelds in general, be sure to revisit this section in my beginner guide for additional insights.

Part 5 - Let's Dive into

More Advanced ArkOS Guides

Now that you’ve explored the basics of ArkOS, it’s time to take things further. You’ve learned how to install it, play your favorite games, customize your experience, and apply tips to optimize performance. But why stop here? Let’s explore even more with advanced ArkOS guides. This section is designed to help you dive into the deeper capabilities of ArkOS and unlock its full potential.

The Advanced Guide section will cover a variety of topics, including how to download and install ArkOS themes, change the default boot logo, enable auto-save and load states for RetroArch games, bulk scrape media and metadata for your library, and much more. These advanced features will allow you to further personalize your device, improve convenience, and even access additional gaming experiences like old PC games using PortMaster.

For ArkOS-specific guides, such as downloading themes or changing the boot logo, I’ll provide full, detailed instructions right here on this page. You’ll find step-by-step processes with visuals like screenshots and GIFs to make every step clear and easy to follow.

For topics that go beyond ArkOS and are relevant to multiple custom firmware—such as installing PortMaster, using RetroArch Achievements, or bulk scraping media—dedicated guides will be provided. These guides cover steps that are largely consistent across firmware like muOS, Knulli, or RockNIX, just click into these guides for detailed instructions. On this page, I will include specific notes, important steps, or any differences to ensure the process is accurate and tailored for ArkOS users. Please use both the information from this page and the dedicated guide pages to complete the process correctly.

Now, let’s get started with the first advanced guide and take your ArkOS experience to the next level!

How to Add Background Music

Do you love retro gaming and want to bring back those nostalgic vibes by listening to iconic retro game tracks, like Pokémon Emerald’s relaxing music at Littleroot Town or Pokémon Centers, while navigating the ArkOS menu? Or maybe you’d prefer your own favorite songs as background music. Good news—you can easily add them to ArkOS!

ArkOS will automatically play your selected tracks every time the device boots up, letting you enjoy your favorite tunes while browsing your game library. It’s a great way to relive those cherished moments from the past when you first played your retro games. Let me show you how to set it up—it’s very easy!

Step 1: Turn off your device and safely remove your SD game card.

Step 2: Plug the SD card into your PC.

Step 3: A disk named EASYROMSwill appear in your disk list, just like when you added games in previous sections. Open the disk, find the folder named bgmusic, and copy your favorite music tracks into it. Make sure the files are in .mp3 format. After copying, safely eject the SD card from your PC.

Step 4: Insert the SD card back into your handheld device and boot it up. Open the ArkOS System Main Menu by pressing the START button from the homescreen. Navigate to Sound Settings and turn on Frontend Music to activate your custom background music. You can also enable the Song Title option to display the current track playing.

It’s that simple. Now you can enjoy your favorite music while browsing through your game library, adding a touch of nostalgia to your retro gaming experience.

How to Download and Install more Themes

The default ArkOS theme looks boring to you? Don’t worry—I’ll show you how to download and install new themes for your device. It’s simple, and with just a few steps, you’ll have fresh, customized themes to enhance your experience.

Step 1: Download Themes

There are many themes available on GitHub for ArkOS. One great resource is the EmulationStation-OGA-Theme-Gallery GitHub page, which features a wide range of themes.

    • Visit the page, click on a theme name, and then click the green Code button.
    • Choose Download ZIP to download the theme to your computer.
How to download ArkOS themes on Github

How to download ArkOS themes on Github

If you find it tricky to navigate GitHub, I’ve made it easier by listing some great themes with direct download links for you.

Theme NameDownload link
AlbedoDownload
Art-Book-Next-ArkOSDownload
ElementerialDownload
SwitchDownload
PixelDownload

Step 2: Extract the Theme

Once the download is complete, extract the zipped file with tool like 7-Zip or WinRAR.

Step 3: Prepare Your SD Card

    • Turn off your retro handheld and remove your game card, then plug it into your PC.
    • Locate the EASYROMS/themes folder on the SD card.

Step 4: Copy the Theme

Copy the theme folder you extracted into the EASYROMS/themes folder on your game card. After the transfer is complete, safely eject the card from your PC.

Step 5: Activate the Theme

    • Insert the SD card back into your device and boot it up.
    • Open the System Main Menu by pressing the START button from the homescreen.
    • Navigate to UI SettingsTheme, then select and activate the theme you just added.

Now, you can explore your newly installed theme! Don’t forget to customize it further using the Theme Configurator in UI Settings, where you can tweak colors, font sizes, image views, and more to make it truly your own. Have fun personalizing your ArkOS device!

How to Change the ArkOS Boot Logo and Game Launching Image

Want to add a personal touch to your ArkOS handheld? Customizing the boot logo and game launching image is a fun and easy way to make your device truly yours. Whether it’s adding your name, a welcoming message, or a creative design, this guide will walk you through every step to create and apply your unique images. Let’s get started!

Step 1: Prepare Your Custom Image

    • Use a photo editing tool like Canva (free) or Photoshop if you’re experienced.
    • Create a template with the correct resolution for your device:
      • Most RK266 and RK3566 retro handhelds: 640×480 pixels.
      • Powkiddy RGB30: 720×720 pixels.
      • Powkiddy V10: 480×320 pixels.
    • Download free images from sites like Canva, Freepik, or Pixabay. Add text such as your name or messages like:
      • Booting logo: “Welcome to my handheld”
      • Game launching image: “Loading... Please wait.”

Create your custom boot logo with Canva

Step 2: Export and Rename Your Images

After you finish designing your custom photo, it’s time to export it:

    • For the boot logo: Export your photo as a .bmp file and rename it to boot.bmp. If you’re using Canva, which doesn’t support .bmp export, you’ll need a file conversion tool such as Convertio or CloudConvert, to convert your .jpg file to a .bmp format.
    • For the game launching image: Export your photo as a .jpg file and rename it to loading.jpg.

Make sure both files are named correctly before proceeding!

Step 3: Transfer the Images to Your SD Card

    • Insert your SD card into your PC.
    • Two drives will appear: BOOT and EASYROMS.
    • Transfer the files:
      • Copy boot.bmp to the BOOTdrive, overwriting the existing file.
      • Copy loading.jpg to the folder EASYROMS/launchimages, overwriting the old file.

Step 5: Boot Your Device and Enjoy

    • Remove the SD card from your PC and insert it back into your ArkOS handheld.
    • Power on your device and open a game to see your custom boot logo and game launching image in action.

With these steps, your handheld will have a unique and personalized touch every time you use it!

Wait... MORE guides coming soon!

And Finnaly, It's Time to

Wrap Up Your ArkOS Journey

ArkOS is an amazing operating system that turns your retro handheld into a versatile and reliable gaming companion. Whether you’re new to ArkOS or have been using it for a while, this guide has covered everything you need—from installing the system and setting up dual-card storage to tweaking performance and organizing your games. It’s designed to make your experience smooth, enjoyable, and stress-free.

With ArkOS, you have the tools to personalize your device exactly how you like it. Whether it’s customizing themes, switching emulator settings, or enabling collections for quick access to your favorite games, ArkOS is built to help you enjoy your retro handheld to its fullest. Plus, the added flexibility of advanced features means there’s always something new to explore as you become more familiar with the system.

At Dino Retro, we believe in making retro gaming accessible and enjoyable for everyone, and we’re committed to keeping this guide up-to-date as ArkOS continues to grow and improve. So, whether you’re revisiting your favorite classics or diving into hidden gems, ArkOS has you covered.

Thanks for following along with this guide! If you ever need to check back for tips or updates, we’ll be here. If you have any questions or need help, feel free to leave a comment—we’re happy to assist. Now, go enjoy your gaming adventures with ArkOS—it’s all about reliving those timeless memories while creating new ones!

author-avatar

About Dino Retro

Dino Retro is your one-stop destination for everything retro gaming! Whether you're a seasoned retro gamer or just starting to explore the classics, we’ve got you covered. From installing custom firmware like Knulli, ArkOS, and Rocknix to adding ROMs, cover art, and setting up cheats, our guides make it easy to level up your gaming experience. Dive into the basics or explore advanced tutorials to unlock the full potential of your handheld devices. At Dino Retro, we’re here to make your journey through gaming nostalgia seamless, exciting, and unforgettable!

Related Posts

Leave a Reply

Your email address will not be published. Required fields are marked *