Welcome, fellow retro gaming enthusiast! If you're reading this, you’re probably either just starting your retro gaming journey or looking for advanced tips to enhance your experience. Either way, you’ve come to the right place. Dino Retro is here to guide you through everything you need to know about retro gaming handhelds—whether you're discovering the magic of classic games or looking to level up your setup.

Retro gaming handhelds are the perfect way to relive those nostalgic moments from the '90s while enjoying modern features that make gaming more convenient than ever. In this guide, I’ll walk you through all the essentials: from choosing the right handheld to setting up your custom firmware, building your game library, and fine-tuning your software settings.

I’ll also show you how to explore advanced features, such as setup Retro Achievements, bulk media & game metadata scraping, and install PortMaster on your device to play old pc games, I’ll share tips on NETPLAY, enhancing your games with shaders, and much more.

For every topic covered, there’s a detailed full guide available through the links provided, so you can follow step-by-step instructions for an in-depth understanding. Don’t forget to click the links for comprehensive walkthroughs to make the most out of your retro gaming experience!

This guide will stay updated with the latest devices, firmware updates, and pro tips, so you can always stay ahead of the game. Let’s dive in and start your retro adventure—there’s a lot of fun waiting for you! 🎮🦕

Table of Contents

Part 1 - Know Your Awesome

Retro Gaming Handhelds

There are a lot of great retro gaming handhelds on the market today, and brands like Anbernic, Powkiddy, Miyoo, TRIMUI, and Retroid Pocket offer a variety of options. Most of these devices run either Linux or Android, and some even let you run both systems with a dual-boot setup.

Linux-based handhelds are generally designed to emulate older, less resource-intensive systems like NES, SNES, GBA, Game Boy, and up to systems like PSP, Dreamcast, or Sega Saturn. These devices are typically affordable and work great for playing classic retro games. On the other hand, Android-based handhelds are built for more demanding systems like PS2, 3DS, and GameCube, providing more power and better performance for these newer games.

In this section, I’ll walk you through some of the most popular Linux-based and Android retro handhelds, their specs, emulation capabilities, and pricing. This will help you make an informed decision about which device best suits your needs. If you've already picked a device, feel free to skip ahead to the next section!

Anbernic - The Most Popular Retro Gaming Handheld Brand

The Original Anbernic RG35XX

Let’s start with the original Anbernic RG35XX. Released in 2023, this handheld was designed to compete with the Miyoo Mini Plus, offering a dual-core ARM Cortex-A9 CPU and 256MB of RAM. It was great for playing games up to GBA and PS1 smoothly, and it supports various custom firmwares like GarlicOS, MinUI, and Koriki. If you have this model today, it’s still perfectly fine for light retro gaming, especially if you enjoy those classic GBA and PS1 games.
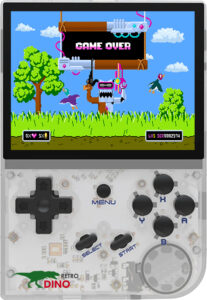
The Original Anbernic RG35XX, Transparent White

The Original Anbernic RG35XX, Transparent White

However, I have to be real with you—while the RG35XX served as a solid entry-level option back in the day, there are now newer and better devices in this price range that offer more power and features. If you’re just starting, it's still a decent choice, but I wouldn’t recommend buying it today unless you find it at a really great deal. For new purchases, you might want to consider newer models from the Anbernic H700 or RK3566 series or other options that provide better emulation support.

Anbernic H-700 chipset series: RG35XX Plus, RG35XX H, RG35XX SP, RG28XX, RG40XX, RG40XX V

If you’re looking for a retro gaming handheld that offers great performance without a hefty price tag, the H-700 chipset series from Anbernic might be exactly what you need. Devices like the RG35XX Plus, RG35XX H, RG35XX SP, RG28XX, RG40XX, and RG40XX V are powered by the H700 quad-core ARM Cortex-A53 chip, running at 1.5GHz, with 1GB of LPDDR4 RAM.

This setup allows the handhelds to run a variety of classic games, from NES and SNES to PS1, PSP, and even some lighter N64 and Dreamcast games. If you're looking for a handheld that provides a solid balance of performance and affordability, Anbernic’s range should be on your radar.

Let’s take a closer look at some of the standout devices in the RG**XX lineup:

RG35XX Plus: This model comes with a 3.5-inch IPS display (640x480) and the Allwinner H700 chip. It supports a wide range of emulators, including PSP, PS1, Dreamcast, and NDS, and offers both Wi-Fi and Bluetooth capabilities. It's a solid option for playing a variety of retro games, and the design is quite portable, available in white, gray, and transparent black.
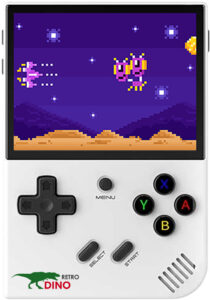
Anbernic RG35XX Plus

Anbernic RG35XX Plus, White

RG35XX H: For those who prefer a more ergonomic design, the RG35XX H features dual analog sticks and a horizontal layout. It shares the same hardware as the RG35XX Plus but offers a slightly different experience. You can find this model in black, white, and transparent purple, making it a great option for comfortable, extended gaming sessions.
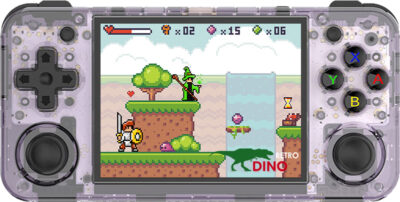
Anbernic RG35XXH

Anbernic RG35XXH, Transparent Purple

RG35XX SP: Inspired by the Game Boy Advance SP, this model features a clamshell design and a 3.5-inch IPS display. If you're looking for a compact handheld that still packs a punch, this could be a great choice.
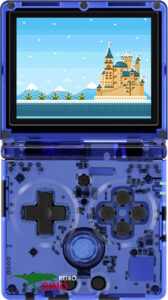
Anbernic RG35XX SP

Anbernic RG35XX SP, Transparent Blue

RG28XX: The RG28XX is a super-portable handheld with a 2.8-inch IPS display (640x480). It’s perfect for those who want something small and lightweight without sacrificing too much on performance. If portability is your priority, this one is worth considering.
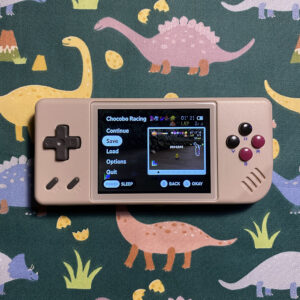
Anbernic RG28XX with MinUI CFW

Anbernic RG28XX with MinUI CFW, Retro Gray

RG40XX H: If you prefer a larger screen, the RG40XX H offers a 4-inch IPS screen (640x480) and comes in horizontal orientations. This model is versatile and comfortable for longer gaming sessions, providing a bigger screen for your games.
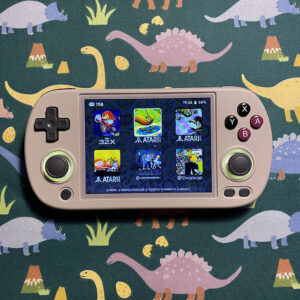
Anbernic RG40XX H with Knulli CFW

Anbernic RG40XX H with Knulli CFW, Retro Gray

RG40XX V: Similar to the RG40XX H but with a vertical orientation, this model offers the same screen size and performance but with a different ergonomic layout, making it a good option for those who prefer vertical designs.
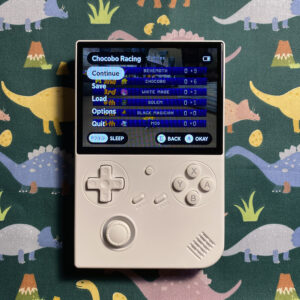
Anbernic RG40XX V with MinUI

Anbernic RG40XX V with MinUI, White

RG CubeXX: The RG CubeXX features a unique cube-like design with a 1:1 screen ratio, paired with a 4.0-inch IPS display. This is particularly useful for games designed for square or near-square resolutions, such as Game Boy games or older arcade titles.
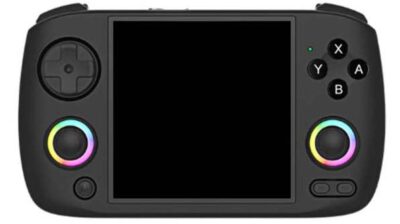
Anbernic RG Cube XX

Anbernic RG Cube XX, Black

Anbernic’s H-700 series handhelds also support a variety of custom firmwares like Knulli, muOS, MinUI, and GarlicOS 2.0. These custom firmwares can enhance the performance and functionality of the devices, giving you a more personalized experience. The price range for these handhelds is typically between $40 and $80, offering solid value for the performance and features they provide.

Anbernic RK3566 chipset series: RG353V, RG353VS, RG353P, RG353PS, RG ARC-D, RG ARC-S, RG353M

Now, if you’re looking for something more powerful, the Anbernic RK3566 series is where you should be looking. These are mid-tier Linux retro handhelds, powered by the RK3566 Quad-Core 64-bit Cortex-A55 chip, clocked at 1.8GHz, and come with 1GB or 2GB of LPDDR4 RAM. What does this mean for you? Well, the performance is much better than the older H700 series, especially when it comes to PSP, N64, and Dreamcast games, and they can even handle Sega Saturn games thanks to the improved CPU and GPU.

What’s even better is that some of these devices support dual-booting into Android, which lets you enjoy PSP and Dreamcast games with even better performance, and access Android apps like the Google Play Store, YouTube, and more. So, if you’re after a bit of everything, these devices are worth considering.

Let’s take a closer look at some of the RK3566 models:

RG353V & RG353VS: These are both vertical handhelds, with a 3.5-inch IPS display (640x480). The RG353V comes with 2GB of RAM, a touchscreen, and Android-Linux dual-boot support, while the RG353VS has 1GB of RAM and is Linux-only. The RG353V is more versatile if you want to explore Android features, while the RG353VS is focused solely on Linux, which some people might prefer for simplicity.
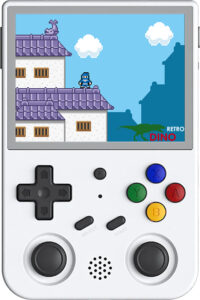
Anbernic RG353 V/VS

Anbernic RG353 V/VS

RG ARC Series: These models are inspired by the classic SEGA Saturn controller design, featuring a circular D-pad for precision and front-facing dual speakers for enhanced sound. The RG ARC-D has 2GB of RAM and supports dual-booting into Android, while the RG ARC-S has 1GB of RAM and runs only on Linux.
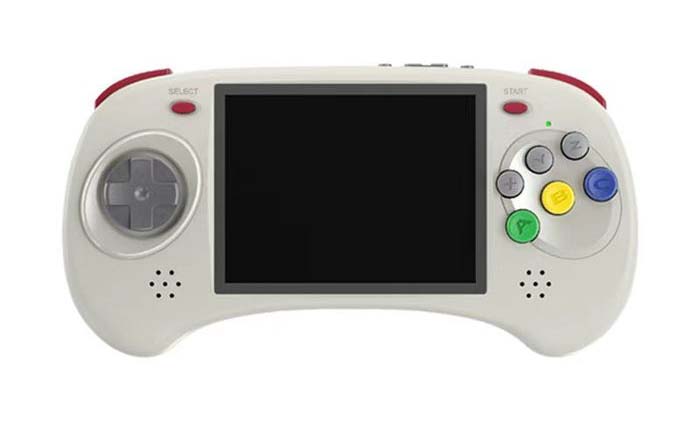
Anbernic RG ARC S/D

Anbernic RG ARC S/D

RG353P & RG353PS: These both feature a 3.5-inch display and the RK3566 chip, but the RG353PS has only 1GB of RAM and runs Linux-only. The RG353P, on the other hand, offers dual-boot support. Both models have a horizontal design, which is great if you prefer a more traditional handheld experience.
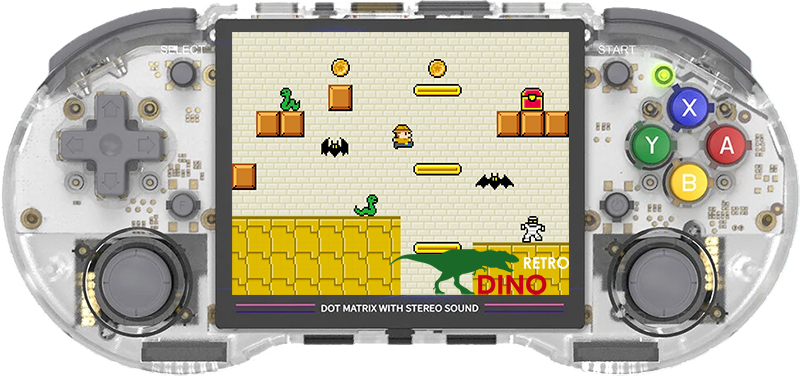
Anbernic RG353P and RG353PS

Anbernic RG353P and RG353PS

RG353M: This is essentially the RG35XX H from the H700 CPU series, but with an upgraded RK3566 chipset and a metal build that adds extra durability and a premium feel. If you’re someone who values build quality and sturdiness, the RG353M is definitely worth a look.
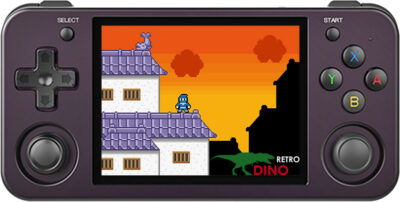
Anbernic RG353M with metal build

Anbernic RG353M with metal build

These devices are generally priced between $80 to $120, depending on where you buy them (like AliExpress or Anbernic’s official store). If you’re serious about retro gaming and want a handheld that can handle more demanding systems, these are excellent options.

Anbernic Android Handhelds: High-Performance Options for Retro Gamers

Let’s dive into Anbernic’s Android-based handhelds, which are the top-tier options in their lineup. These devices offer impressive power and versatility, making them a great choice if you're looking to play both retro classics and more demanding systems like PSP, Dreamcast, Saturn, and even PS2 and 3DS. What’s great about these handhelds is that they’re all powered by high-performance chipsets like the Unisoc Tiger T618 or T820, and come with either 4GB or 8GB of RAM—a significant upgrade if you want to enjoy smoother, faster gameplay.

Since these devices run Android, you’ll need to install RetroArch or other emulator apps from the Google Play Store or manually using APK files. To make your experience even better, I recommend adding a retro gaming front-end like Daijosho, ES-DE, Beacon, Pegasus, or Dig. These will help you navigate your game library more easily and create a streamlined experience. Sounds complicated? Don’t worry—I’ve got you covered with my Complete Guide to Android Retro Handhelds.

Here’s a closer look at some of the standout models:

Anbernic RG556: If you’re looking for a powerful device with a larger, more vibrant display, the RG556 might be the one for you. It has a 5.48-inch AMOLED display (1920x1080), powered by the Unisoc T820 processor with 8GB of RAM and 128GB of expandable storage. With Android 13, this device also features hall-effect joysticks, 1080p output, and active cooling for better performance. It’s built to last with a 5500mAh battery, offering up to 8 hours of playtime. Priced at $184.99, it’s perfect for anyone who wants a bigger screen for immersive gaming.
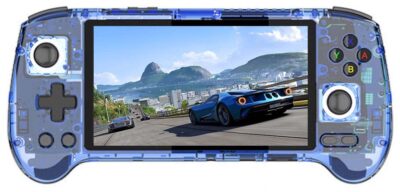
Anbernic RG556

Anbernic RG556, Transparent Blue

Anbernic RG Cube: The RG Cube has a unique 3.95-inch IPS display (720x720) with a 1:1 aspect ratio, making it ideal for retro games that use square screens. It shares the same Unisoc T820 processor, 8GB RAM, and 128GB storage as the RG556 but comes in a more compact form. The 5200mAh battery offers about 7 hours of gaming. Priced at $169.99, the RG Cube is a great choice if you love the aesthetics of square-screen classics and want a portable, stylish device.
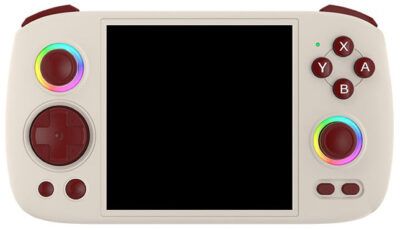
Anbernic RG Cube

Anbernic RG Cube

Anbernic RG406V: The RG406V adopts a vertical design with a 4-inch IPS screen (960x720) and a classic 4:3 aspect ratio, making it perfect for traditional retro games. With the same Unisoc T820 processor, 8GB RAM, and 128GB storage, the RG406V delivers solid performance. Its 5500mAh battery gives up to 8 hours of playtime, and it also features hall-effect joysticks and active cooling. Priced at $138.59, this is a great option if you prefer a vertical handheld experience.
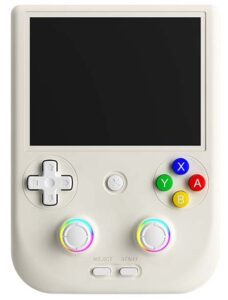
Anbernic RG406V

Anbernic RG406V, White

Anbernic RG405M: The RG405M offers a 4-inch IPS screen (640x480) with a 4:3 aspect ratio and is powered by the Unisoc T618 processor. It has 4GB RAM and 128GB expandable storage, along with a 4500mAh battery that provides up to 7 hours of playtime. Running on Android 12, the RG405M is built with a durable aluminum alloy body, offering both performance and premium quality. At $179.99, it’s perfect for those who prioritize build quality and classic gaming.
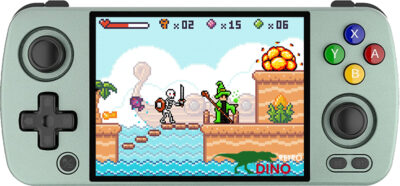
Anbernic RG405M, with metal build

Anbernic RG405M, with metal build, mint color

If you’ve already got an Anbernic Android device or are thinking about picking one up, make sure to check out my complete Android retro gaming handheld guide for detailed setup instructions and tips.

Anbernic RG552: A RK3599 Dual Boot Linux-Android Handheld

If you’re looking for the ultimate Linux-based retro gaming handheld, the Anbernic RG552 is definitely worth considering. Powered by a six-core RK3599 CPU (1.8GHz) and 4GB of RAM, it’s designed to run everything from NES and SNES to heavier systems like PSP, Dreamcast, and Sega Saturn smoothly. Plus, you can enjoy even more power thanks to custom firmwares like ROCKNIX (formerly JELOS) and AmberELEC, which can enhance its performance beyond the stock firmware.
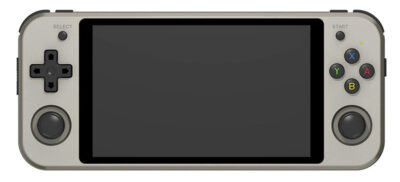
Anbernic RG552 with Android-Linux dual-boot

Anbernic RG552 with Android-Linux dual-boot

The RG552 also offers the option to dual-boot into Android, giving you the flexibility to run Android apps and games, all while enjoying additional gaming performance. Whether you want to keep it strictly for retro gaming or need the full Android experience, this handheld is a solid choice.

You can pick up the RG552 from AliExpress, Amazon, or the Anbernic website, with prices ranging from $180 to $200.

My Thoughts on Anbernic Retro Handhelds

Anbernic offers a well-rounded selection of retro gaming handhelds, with something for everyone—whether you prefer Android or Linux-based systems. Their Android devices, such as the RG556, RG Cube, and RG405M, provide excellent performance for a range of retro games, including more demanding systems like PSP, Dreamcast, and PS2. These devices come with powerful chipsets like the Unisoc Tiger T618 or T820 processors and up to 8GB of RAM, making them suitable for both retro classics and newer games like 3DS.

On the other hand, Anbernic’s Linux-based devices, like the H700 series or RK3566 series, are great for classic retro gaming, covering systems up to PSP and Sega Dreamcast. They’re stable, simple to use, and are supported by various custom firmwares like Knulli, muOS, and MinUI, ArkOS which offer additional features and improved performance.
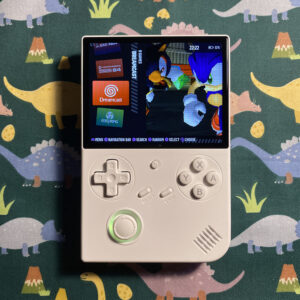
Anbernic RG40XX V running Knulli CFW

Anbernic RG40XX V running Knulli CFW

For those looking for flexibility, Anbernic’s dual-boot devices like the RG552 let you run both Android and Linux, giving you the best of both worlds—stability for retro gaming and the versatility of Android for apps and additional features.

Ultimately, Anbernic provides solid options across different price ranges, from budget-friendly handhelds to more powerful, premium models. Whether you prefer something compact like the RG28XX or want a larger screen for more immersive gaming, Anbernic’s devices offer great value for retro gaming enthusiasts. The choice really comes down to your gaming preferences, desired portability, and how much customization you want from your handheld.

Powkiddy Retro Handhelds – Affordable Yet Great Value

Let’s talk about Powkiddy, another solid player in the world of retro gaming handhelds.

Powkiddy RK3266 Chipset Series - A Reliable Entry to Retro Gaming: Powkiddy RGB10X, V10, RGB20S, etc

If you’re just getting started or looking for something that won’t break the bank but still delivers a fun gaming experience, Powkiddy’s RK3266 chipset series could be exactly what you need. These devices are powered by a quad-core 64-bit RK3266 CPU running at 1.5GHz and come with 1GB of RAM, making them capable of running games from NES, SNES, GBA, PS1, and NDS smoothly. Plus, they handle some light Dreamcast, N64, and PSP games without any issues, which is perfect if you enjoy a mix of retro classics and some more demanding titles.

The Powkiddy RGB10X, V10, and RGB20S are all affordable options that cater to different gaming styles and preferences. Let’s break down each one to help you decide which might be the right fit for you:

Powkiddy RGB10X: This handheld features a 3.5-inch IPS display (640x480), powered by the RK3326 processor and 1GB RAM. It’s a traditional horizontal layout and includes dual microSD slots for storage, with a battery life of around 8 hours. The RGB10X also has 1 joystick on the left, which may help you control the character better in some 3D titles on PS1, PSP, or N64. If you’re looking for a portable option with solid performance, the RGB10X could be a good choice.
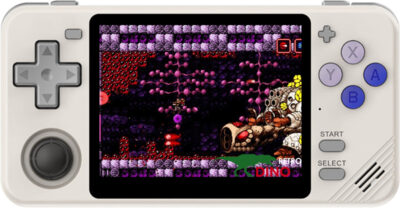
Powkiddy RGB10X

Powkiddy RGB10X, White

Powkiddy V10: For those on a tighter budget, the V10 offers a 3.5-inch screen (480x320) with a 3:2 screen ratio, which is perfect for Gameboy Advance titles or Arcade games. It features the same RK3326 processor, ergonomic LR triggers, and provides about 4-6 hours of battery life, using a single TF card for storage. It’s a more affordable option that still delivers good performance for the price.
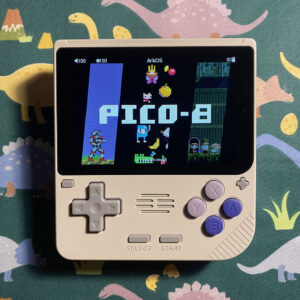
Powkiddy V10 running ArkOS

Powkiddy V10 running ArkOS

Powkiddy RGB20S: The RGB20S brings the same specs as the RGB10X, but with a vertical design and dual 3D joysticks for a more modern feel. It also comes with dual TF card slots and a 3500mAh battery that lasts around 5 hours. If you like the vertical form factor, this could be a great pick for you.
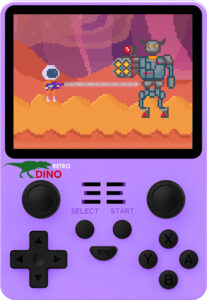
Powkiddy RGB20S

Powkiddy RGB20S, Purple

While none of these models have Wi-Fi or Bluetooth, they still deliver excellent performance for retro gaming, and they are all supported by popular custom firmwares such as ArkOS, AmberELEC, and ROCKNIX. These custom firmwares can give you additional features, improve emulator performance, and provide a smoother, more polished experience.

Powkiddy RK3566 Series - A Step Up in Power: Powkiddy RGB30, RGB10MAX3, RGB20SX, X55, RGB20 PRO, RK2023

These are the mid-tier linux retro handhelds from Pokiddy, powered by a RK3566 Quad-Core 64 bit Cortex-A55, main frequency up to 1.8GHz , 1GB RAM LPDDR4. These devices have the same emulation performance as the Anbernic RK3566 series, which means you can play all retro games up to PS1 and NDS perfectly. They also provide much better performance on N64, PSP and Dreamcast systems, compare to the RK3266 chipset series.

You'll find a variety of options in this Powkiddy's lineup, each catering to different gaming preferences and needs. Here’s a breakdown of some of their most notable models:

The RGB30 and RGB20SX are compact handheld consoles with vertical designs and 4-inch IPS displays with a 720x720 resolution. The RGB30 is a more compact option, featuring a smaller battery, while the RGB20SX offers a larger 5000mAh battery for extended playtime, making it perfect for longer gaming sessions.
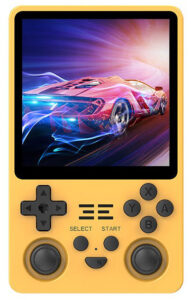
Powkiddy RGB20SX

Powkiddy RGB20SX, Yellow

Powkiddy RGB30

Powkiddy RGB30, Red

For those who prefer a larger screen, the RGB10MAX3 and X55 provide 5-inch and 5.5-inch IPS displays, respectively. Both consoles use the powerful RK3566 processor and feature long-lasting batteries, offering an immersive experience with a comfortable horizontal layout. The X55 provides a slightly larger screen, making it a great option for those who enjoy bigger visuals.
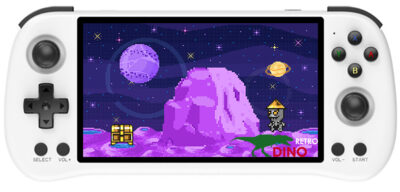
Powkiddy X55

Powkiddy X55, White

Powkiddy RGB10MAX3

Powkiddy RGB10MAX3, Transparent Blue

The RK2023, a smaller and more portable option, features a 3.5-inch IPS screen with 640x480 resolution. With its compact size, Wi-Fi, and Bluetooth connectivity, it's a fantastic choice for gamers who need something lightweight yet capable of handling retro titles.
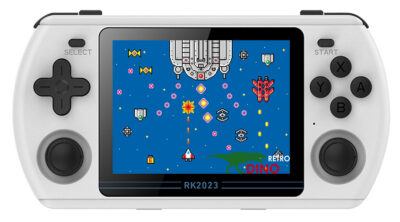
Powkiddy RK2023

Powkiddy RK2023, White

These RK3566 models also support popular custom firmware options like ArkOS, ROCKNIX (JELOS), MinUI, and Knulli, all of which can enhance the performance and usability of your handheld. You can usually find these devices priced between $70-$90 on sites like AliExpress, Amazon, or Powkiddy’s official website.

Should You Get A Powkiddy Retro Gaming Device?

Whether you’re starting with a budget-friendly model like the Powkiddy V10 or stepping up to something more powerful like the Powkiddy RGB20SX, these handhelds are all solid choices for anyone interested in retro gaming. You can enjoy a range of systems, from NES to PSP and even N64, all with decent emulation performance. Plus, the option to install custom firmwares makes it easy to personalize your experience and get the most out of your handheld.

Miyoo Retro Handhelds

Let’s dive into Miyoo’s retro handhelds, a brand that’s been making waves in the retro gaming world, especially for those who value portability and simplicity. Whether you're a newcomer or just want something small and easy to carry, Miyoo has a couple of great entry-level devices that might be exactly what you're looking for.

Miyoo Mini v4 & Miyoo Mini Plus: Compact and Reliable for Retro Gaming

First up, we’ve got the Miyoo Mini v4 and Miyoo Mini Plus. These two models are great options if you're looking for something that can handle all the classic retro games, yet still be pocket-sized.

Miyoo Mini v4: This handheld features a 2.8-inch screen, making it super compact and lightweight (only 107 grams). It’s small enough to fit in your pocket, which means you can take it anywhere. Despite its size, it’s still fully capable of handling NES, SNES, GBA, and PS1 games without breaking a sweat.
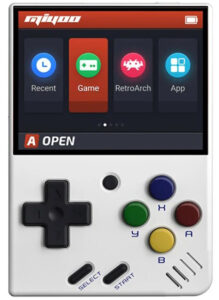
Miyoo Mini v4

Miyoo Mini v4, White

Miyoo Mini Plus: If you prefer a slightly larger screen, the Mini Plus comes with a 3.5-inch screen for a more spacious display. It’s still portable, just a bit bigger than the v4. It also offers a longer battery life, so if you’re into longer gaming sessions, this might be the better option.
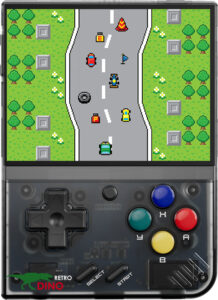
Miyoo Mini Plus

Miyoo Mini Plus, Transparent Black

Both devices are powered by an ARM Cortex A7 dual-core processor running at 1.2GHz and come with 128MB of RAM. For anyone primarily playing older retro games, these devices will serve you well. They also support several custom firmware options like Onion OS, Koriki, or MinUI, which can improve the user interface and overall performance.

If portability and the ability to play retro games anywhere are your priorities, these handhelds are great starters. You can find the Miyoo Mini v4 and Mini Plus on AliExpress or Amazon for around $45 to $60.

Miyoo A30: The Latest Mini Horizontal Retro Handheld

If you’re looking for something a bit newer, the Miyoo A30 might catch your attention. This is Miyoo’s latest mini horizontal retro handheld, and it’s packing some solid features for its price.

It comes with an Allwinner A33 quad-core CPU (clocked at 1.3GHz) and 512MB of RAM. This setup allows it to handle GBA and PS1 games smoothly, and it can even tackle some NDS and Dreamcast games, although with lighter performance on the latter. The Miyoo A30 is a compact, affordable option for anyone who wants a mini handheld for retro gaming, without compromising too much on performance.
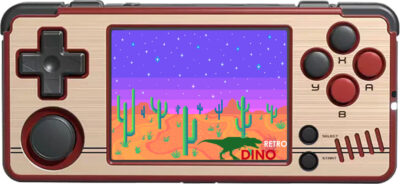
Miyoo A30, Red and Golden

Miyoo A30, Red and Golden

When the A30 first came out, the stock firmware had a few performance issues and bugs, but the community quickly stepped up with SpruceOS. This custom firmware addresses those issues and significantly boosts gaming performance. If you prefer something simpler and cleaner, MinUI is another custom firmware option that focuses on providing a straightforward and easy-to-use interface.

The Miyoo A30 is priced around $35 to $45 on AliExpress or Amazon, making it a solid, budget-friendly choice for retro gaming enthusiasts.

Is Miyoo the Right Brand for You?

If you’re just getting started with retro gaming or you want a lightweight device that can easily fit into your pocket, Miyoo handhelds are definitely worth considering. Whether it's the Miyoo Mini v4, Mini Plus, or the latest A30, these devices offer great performance for a very reasonable price. And with the support of custom firmware like Onion OS, SpruceOS and MinUI, you’ll be able to fine-tune your experience and improve the gaming performance even more.

TRIMUI Retro Handhelds

Let’s talk about Trimui—a brand that’s been carving out its niche in the retro gaming world with devices that balance performance and portability recently. If you’re looking for a retro handheld that delivers solid gameplay without burning a hole in your wallet, the Trimui Smart Pro and Trimui Brick might be exactly what you need.

Trimui Smart Pro: A Budget-Friendly Option for Retro Gamers

First up is the Trimui Smart Pro, a portable retro handheld designed with classic gaming enthusiasts in mind. The 4.96-inch IPS display (1280x720 resolution) delivers crisp visuals, making it a great option for gaming on the go. It’s powered by the Allwinner A133plus quad-core CPU and PowerVR GE8300 GPU and 1GB of RAM, which is enough to handle a wide range of retro games smoothly. With 8GB of internal storage, expandable up to 256GB with a TF card, you’ve got plenty of space for your games.
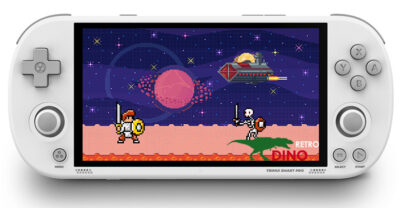
Trimui Smart Pro

Trimui Smart Pro, White

The Trimui Smart Pro runs a custom Linux OS and supports over 20 emulators, including PSP, NES, GBA, and PS1, giving you access to a wide variety of retro titles. The device also features a 5000mAh battery, offering up to five hours of gameplay, and it comes with Wi-Fi connectivity, enabling online multiplayer gaming. So, whether you’re playing solo or with friends, the Trimui Smart Pro has you covered.

For those who want a bit more flexibility, it supports various custom firmware options, like Knulli for advanced emulation, MinUI for a simpler interface, Tomato OS for stock enhancements, and CrossMix OS for optimized performance and more customizable features.

However, keep in mind that while the Trimui Smart Pro handles games up to PS1 well, it may struggle with more demanding systems like PSP or N64. Still, if you're looking for a budget-friendly device for classic games, this is a great option. You can find it on AliExpress for around $55 to $80 (excluding shipping).

Trimui Brick: Compact, Stylish, and Ready for Retro Action

Next up, we have the Trimui Brick, a more compact handheld with a modern design. It features a 3.2-inch IPS display (1024x768 resolution), which is sharp enough for classic games, though it’s smaller than the Smart Pro. Powered by the Allwinner A133P processor and 1GB of RAM, it supports emulation for systems up to PSP and Dreamcast, but like the Smart Pro, it may struggle with more demanding systems like N64.

What stands out about the Trimui Brick is its customizable RGB lighting and detachable shoulder buttons, which add a unique touch to the device’s design. It also offers Wi-Fi and Bluetooth connectivity, so you can enjoy multiplayer gaming or use wireless controllers for a more comfortable experience.
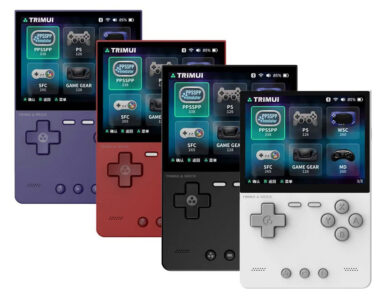
Trimui Brick Retro Gaming Handhelds

Trimui Brick Retro Gaming Handhelds

As of now, the Trimui Brick doesn’t have as many custom firmware options as other devices, but it supports MinUI, a lightweight launcher for simplicity, and CrossMix-OS, which enhances the stock interface with added features and improved performance. As the device gains popularity, we can expect more custom firmware options to pop up.

If you’re looking for a compact and stylish handheld for classic retro games, the Trimui Brick is worth considering. Like the Smart Pro, it’s priced between $60 to $80 (excluding shipping) on AliExpress, making it an affordable option for retro gaming fans.

Final Thoughts on Trimui Devices

Both the Trimui Smart Pro and Trimui Brick are great choices if you're looking for affordable, portable retro gaming handhelds. While they’re not the most powerful devices out there, they deliver smooth performance for older systems like PS1, GBA, and NES. They also provide flexibility with custom firmware options, allowing you to enhance performance and customize your gaming experience.

If you're just getting into retro handhelds or want a secondary device for on-the-go gaming, the Trimui Smart Pro and Trimui Brick could be the perfect fit for you. They may not handle the most demanding games, but for retro classics, they get the job done at a budget-friendly price.

Got any questions or need advice on choosing between these models? Feel free to reach out—I'm always here to help!

Retroid Pocket Retro Handhelds: Premium Quality for Retro Gaming Enthusiasts

When it comes to premium retro gaming handhelds, Retroid Pocket has earned its place at the top of the game. Known for their high performance, sleek designs, and exceptional emulation capabilities, Retroid devices blend the best of classic gaming with modern tech. Let’s take a look at some of their standout models.

Retroid Pocket Mini: Compact and Powerful

The Retroid Pocket Mini is a compact handheld designed for those who want powerful performance in a portable form. Featuring a 3.7-inch AMOLED touchscreen (1280x960 resolution) and powered by the Snapdragon 865 processor, this device packs a punch for its size. It’s equipped with 6GB of RAM, 128GB of internal storage and a microSD card slot, and runs Android 10. With Wi-Fi 6 and Bluetooth 5.1, it has excellent connectivity options, and the 4000mAh battery offers solid playtime.
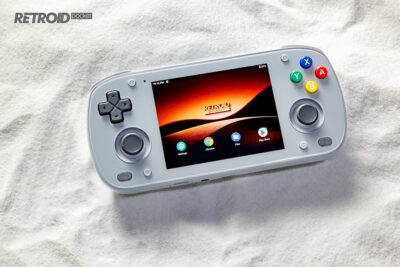
Retroid Pocket Mini

Retroid Pocket Mini

What makes the Retroid Pocket Mini stand out is its ability to emulate games up to PS2 and GameCube, all while being enhanced by the vibrant AMOLED display. Its ergonomic grips, hall-effect analog sticks, stacked shoulder buttons, and dual speakers make for an immersive experience. At $199, it’s a great choice for retro gaming enthusiasts who want a compact yet powerful device.

Additionally, the Retroid Pocket Mini supports dual-boot functionality, allowing users to install and run Linux-based systems like ROCKNIX and Batocera, expanding its versatility. However, its small screen and relatively high price point might deter some, especially those looking for more budget-friendly options.

Retroid Pocket 5: Power and Portability

Next up is the Retroid Pocket 5, a powerhouse in a sleek design. With a 5.5-inch 1080p AMOLED touchscreen, this device gives you a vibrant, crystal-clear display, making it ideal for extended gaming sessions. It runs on the Snapdragon 865 processor, with 8GB of RAM and 128GB of internal storage and a microSD card slot—plenty of power for emulating PS2, GameCube, and other more demanding systems. The Wi-Fi 6, Bluetooth 5.1, and 5000mAh battery ensure smooth gameplay and long-lasting playtime.
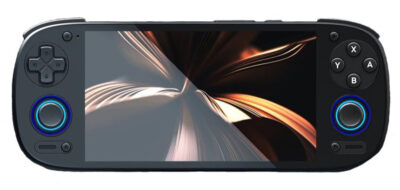
Retroid Pocket 5

Retroid Pocket 5

The Retroid Pocket 5 also includes hall-effect analog sticks, ergonomic grips, stacked shoulder buttons, and dual speakers, ensuring a premium gaming experience. The addition of active cooling helps keep performance at its best during intensive gaming sessions.

Like the Pocket Mini, the Retroid Pocket 5 supports dual-boot functionality, enabling users to install Linux-based systems such as ROCKNIX and Batocera. Priced at $219, it stands out for its high-quality display, powerful performance, and comfortable design. While it’s a great choice for those who prioritize performance, the larger size might make it less portable compared to smaller handhelds.

Retroid Pocket 4 and 4 Pro: Versatile and Affordable

The Retroid Pocket 4 and Retroid Pocket 4 Pro are designed for retro game emulation and Android gaming, with both featuring a 4.7-inch IPS touchscreen, hall-sensor joysticks, and responsive buttons. The Retroid Pocket 4 runs on the MediaTek Dimensity 900 chipset with 4GB RAM, while the Pro model steps it up with the Dimensity 1100 chipset and 8GB RAM, offering superior performance. Both models come with 128GB of internal storage, microSD card slot, Wi-Fi 6, Bluetooth 5.2, and a 5000mAh battery. These devices can emulate systems up to PS2 and GameCube and also support game streaming services.
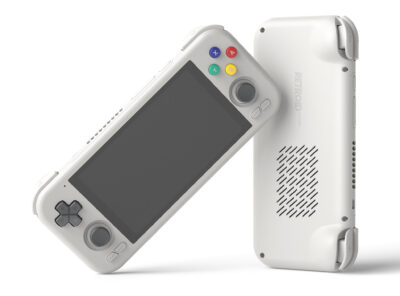
Retroid Pocket 4 and 4 Pro

Retroid Pocket 4 and 4 Pro

If you’re looking for a great all-rounder that offers solid performance at a more affordable price, these are excellent options. Whether you're playing classic retro titles or streaming modern games, the Retroid Pocket 4 and 4 Pro can handle it all.

Retroid Pocket 2S: A Budget-Friendly Option with Solid Performance

If you’re on a tighter budget but still want a quality retro handheld, the Retroid Pocket 2S is worth considering. It comes with a 3.5-inch 640x480 touchscreen and is powered by the Unisoc T610 processor, along with 3GB or 4GB of RAM and 32GB or 128GB of internal storage, with microSD card slot for storage expansion. This device runs on Android 11 and offers a 4000mAh battery for extended playtime.
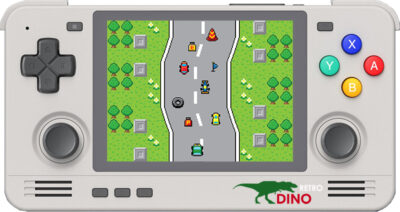
Retroid Pocket 2S

Retroid Pocket 2S

While it may not handle the most demanding games like PS2 or GameCube, the Retroid Pocket 2S does a great job with PS1, PSP, N64, and Dreamcast games. It’s a compact, budget-friendly option, priced starting at $99.90, making it a solid choice for anyone just getting into retro gaming without wanting to spend a lot.

Final Thoughts on Retroid Pocket Devices

Retroid Pocket handhelds are a great choice for anyone serious about retro gaming. Whether you want something compact and portable like the Retroid Pocket Mini, or a more powerful option like the Retroid Pocket 5, there’s a device to suit your needs. With the ability to emulate everything from PS1 to PS2 and GameCube, Retroid gives you a premium gaming experience without the need for bulky hardware.

While the higher-end models like the Retroid Pocket 5 offer excellent features and performance, the Retroid Pocket 2S and 4 series provide great value for those who want solid emulation at a more affordable price.

No matter which model you go for, Retroid Pocket handhelds are built to impress with their quality, performance, and user experience. Let me know if you have any questions about which one might suit you best—I’m here to help guide you to the perfect device!

Game Console/DataFrog Retro Handhelds: The Budget Kings of Retro Gaming

If you're diving into retro gaming and need something affordable but functional, Game Console/DataFrog has you covered. Their R36S Retro Handheld is a compact, user-friendly device that offers great value for its price. Whether you’re a beginner or looking for a secondary device to carry your retro gaming library on the go, the R36S is a solid pick.

Game Console/DataFrog R36S: Compact, Affordable, and Ready to Play

Let’s take a closer look at the R36S Retro Handheld. This device features a 3.5-inch IPS display (640x480 resolution), which may be small but still offers crisp and vibrant visuals for a wide range of classic games. Powered by the RK3326 ARM Cortex-A35 CPU, the R36S handles retro systems like NES, SNES, GBA, PS1, and even some N64 and PSP games. However, it’s important to note that while the device can emulate N64 and PSP games, performance may not be as smooth as it is for the older systems. It struggles with more demanding titles, so if those systems are your primary focus, you might want to consider a more powerful device.
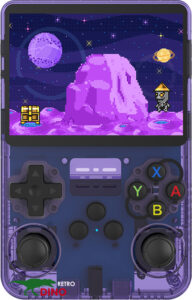
Game Console/DataFrog R36S

Game Console/DataFrog R36S

The R36S runs on ArkOS, a customizable operating system that makes it easier to manage your emulators and games. This is great for personalizing your device and improving your overall experience.

With its 3500mAh removable battery, you can expect about 6 hours of gameplay, which is solid for extended sessions. The ergonomic design includes ABXY buttons, a D-pad, analog sticks, and shoulder buttons (R1/L1, R2/L2), ensuring comfort during gaming. Plus, the device has dual USB-C ports, a headphone jack, and Wi-Fi via a USB-C dongle for multiplayer gaming or media streaming.

While the R36S offers great portability and decent performance for many retro games, it can have slowdowns when emulating more demanding systems like N64 and PSP. Also, while it has a decent build quality for its price, it doesn’t feel as premium as more expensive handhelds.

'I Have Purchased My Retro Handhelds, What to Do Next?'

Now that you’ve reached the end of this section on choosing your very first retro handheld (or perhaps your second or third—we know it’s hard to stop at just one when there’s so much retro gaming fun to be had!), you might have decided which handheld to buy or just already bought it.

Next, we’ll dive into custom firmware for Linux-based retro handhelds. In the upcoming section, you’ll learn how to install and make the most of your favorite custom firmware on your new linux retro gaming device. If you like the stock firmware, you can skip the custom firmware and go directly to the 3rd section, where you will learn how to Add your own games and play them on your devices

If you purchased an Android handheld, check out my Full Guide on Android Retro Handhelds to get started!

Part 2 - Installing & Using Your Favorite

Linux Custom Firmwares

If you're using or planning to buy a Linux-based retro handheld, this section is for you. If you’re after an Android device, feel free to skip ahead to the later section where we dive into that.

Let’s talk about custom firmware—it’s one of the best ways to truly enhance your retro gaming handheld experience. Custom firmware can make a huge difference in performance and usability. It’s all about getting more from your device, and I’m here to walk you through what it is and why it’s worth considering.

ArkOS CFW on Powkiddy V10

ArkOS CFW on Powkiddy V10

What is Custom Firmware

Custom firmware (CFW) refers to community-developed operating systems or software environments that replace or enhance the stock firmware that comes with your retro handheld. These CFWs are created to improve your device’s performance, add new features, and provide an overall better experience tailored to retro gaming enthusiasts like you and me.

Why Use Custom Firmware on Your Retro Gaming Devices?

Custom firmware is a game-changer for your retro handheld. Here’s why I recommend it:

Improved Emulator Support

One of the most noticeable improvements you’ll experience with custom firmware is enhanced emulator support. Custom firmware often includes optimized versions of emulators or new optimal RetroArch cores that provide better performance and compatibility with various gaming systems, as well as new features that are not available on stock firmware cores.

For example, in some stock firmware, there's only one default core for GBA games called mGBA. By installing new custom firmware like muOS or Knulli, you can use a new core gpSP, which will allow you to trade Pokemons or even battle with you friends in all classic Pokemon titles by activating its new feature GBA Link Cable Adapter.

Plus you get access to a wider range of emulators that the stock firmware might not support. If you love playing classic games, this opens up a whole new world of retro systems you can enjoy.

More Enhanced Features

Custom firmware is packed with extra features that really improve the overall experience. These can include auto save and load states, fast-forward, screen scaling, and customizable controller mappings—all features that aren’t always available on stock firmware. Some custom firmware, such as ArkOS, come with preloaded cheat files integrated into the RetroArch setup, saving you the hassle of installing cheats manually. With these added functions, your gaming experience becomes smoother, more enjoyable, and more flexible. You can play your games the way you want to.
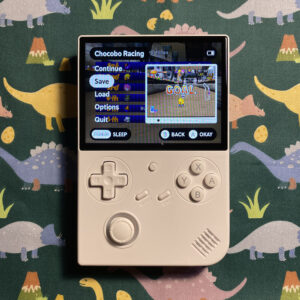
MinUI on Anbernic RG40XX V

MinUI on Anbernic RG40XX V

Expanded Game Library Management

When you’ve got a large library of games, managing it can become a hassle. Custom firmware provides better tools for organizing and sorting your ROMs, making it easier to find the games you want to play. It also supports a wider variety of file formats, giving you more flexibility in how you store and access your games.

Performance Optimizations

Custom firmware optimizes the performance of your handheld by improving CPU and GPU utilization. This means you get smoother gameplay, even with more demanding titles. Some custom firmware also allows for overclocking, which can boost your device’s performance and let you play more graphically intensive games without issues.

Regular Updates

One of the best parts about custom firmware is the active community support. Since it’s driven by the community, these firmware options receive frequent updates that fix bugs, introduce new features, and ensure your device stays up to date. Even after the manufacturer stops releasing updates for your device, custom firmware can continue to provide long-term support and improvements.

Customizable User Experience

Finally, custom firmware gives you the freedom to personalize your handheld. Want to change the theme, skin, or layout of your interface? No problem. Want to tweak the audio, video, or control settings to match your preferences? You can do that too. Custom firmware lets you create a gaming experience that’s truly yours, making every session more enjoyable.

Popular Custom Firmwares, Installing & Using Guides

Custom firmware is a great way to improve the performance and functionality of your retro gaming handheld. If you’ve been using a retro handheld for a while, or if you’ve just bought one and want to take it to the next level, installing custom firmwares is a game-changer. In this section, I’ll walk you through some of the most popular options out there and guide you how to install them on your devices.

ArkOS: Clean, Intuitive, and High-Performance

First up is ArkOS, one of the most widely used custom firmware options, especially for Powkiddy, Anbernic devices and other RK3326-based handhelds. Known for its clean and intuitive interface, ArkOS makes navigating through your games and settings effortless. Whether you’re a newcomer to custom firmware or a seasoned retro handheld enthusiast, ArkOS is easy to use, reliable, and backed by an active community that consistently provides updates, bug fixes, and performance improvements. This regular support ensures ArkOS remains a favorite among retro gaming fans.

ArkOS truly shines with its extensive emulator support, handling over 90 gaming systems ranging from classic consoles like NES and SNES to more demanding platforms like PSP and Sega Saturn. Additionally, its PortMaster integration allows users to play over 500 modern indie classics, including favorites like Stardew Valley and Celeste. 
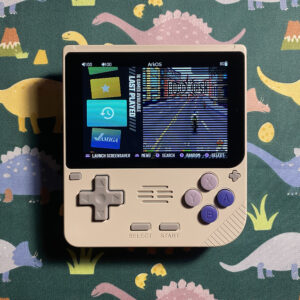
Powkiddy V10 with ArkOS

Powkiddy V10 with ArkOS

Another standout feature is ArkOS's user-friendly ROM management. With support for FAT32 and exFAT partitions, it’s easy to manage your ROMs by simply plugging your SD card into a Windows PC—no complicated setup required. Additionally, ArkOS supports both single and dual-card setups, providing flexibility based on your preferences.

    • If you prefer simplicity, you can store both the firmware and your games on the same card. However, the downside of this approach is that if your device fails to boot due to a firmware or card issue, you risk losing all your game data and save files. In some cases, you might be able to copy the data from your single card to your PC for storage or backup before proceeding to clean format and reinstall a fresh new system or firmware on the card. This added risk makes proper backups an essential precaution for single-card setups.
    • Alternatively, you can install the firmware on the first card slot and use the second card slot for game storage. This dual-card setup offers the added convenience of easily transferring your game library to other ArkOS devices—just plug and play your dedicated game card from one device to another—making it ideal for those with multiple handhelds. The dual-card setup also provides independence between your ArkOS firmware card and game card, making recovery a breeze if there’s an issue with the firmware on the first card. Simply reinstall the firmware on a new card, plug it into the first slot, insert your game card into the second slot, and you’re ready to continue playing with all your games and save data intact.

Moreover, most RK3326 devices, like the RGB10X or V10, benefit from ArkOS's stable sleep mode, allowing you to pause your game and resume right where you left off. For those with devices equipped with the RK3566 chipsets like Powkiddy RGB30 or Anbenic RG353PS, ArkOS extends its functionality beyond gaming by supporting media features like Kodi, enabling users to watch videos or stream YouTube directly from their handheld.

With its robust feature set and exceptional ease of use, ArkOS continues to set a high standard for custom firmware in the retro gaming community. Check out the list of ArkOS supported devices:

    • Anbernic RG353V/VS, RG353M, RG351V, RG351MP, RG351P, RG353P/PS
    • Powkiddy RGB10X, V10, RGB30, RK2023, RGB20S
    • Game Console/DataFrog R36S, R35S, etc.

If you’re ready to give ArkOS a try, check out our full guide on installing and using ArkOS. It’ll walk you through the process step-by-step, ensuring that your device is set up and optimized for maximum retro gaming fun.

muOS: Simple, Speedy and Customizable

Next up is muOS, another fantastic custom firmware designed for retro handhelds. muOS shines with its simplicity and ease of use, making it a great choice for both beginners and experienced users alike. It’s compatible with several devices, including the Anbernic RG28XX, RG35XX, and RG40XX models, and is known for its smooth gaming experience and user-friendly design.

What I love about muOS is its customizability and speed. It boasts a fast boot time, getting you straight into your gaming or device management without delays. The system is incredibly user-friendly, allowing you to personalize it with themes and utilize handy hotkeys for quick adjustments like changing brightness or performing safe restarts. Whether you're diving into your favorite games or managing your device settings, muOS makes everything seamless and efficient.

MuOS is a versatile firmware that supports a wide range of classic gaming systems. It enables seamless emulation for older systems such as NES, SNES, GBA, and PS1, while also handling more demanding platforms like PSP and N64. MuOS also provides awesome PortMaster support, allowing games like Stardew Valley and Celeste to run flawlessly. Its optimized compatibility ensures a smooth and reliable gaming experience for these popular titles.

Adding to its appeal is the active and supportive community behind it, consistently delivering updates, fixing bugs, and enhancing the firmware. With muOS, you’re not just getting a firmware; you’re stepping into a constantly evolving ecosystem designed to make your retro gaming experience as smooth and enjoyable as possible.

All the good things mentioned make muOS, in my opinion, the best custom firmware for the Anbernic H700 chipset series right now. However, it does have a minor downside—lacking Bluetooth support. This means you cannot connect wireless controllers or headphones that use Bluetooth. The good news is that the developers are already planning to integrate Bluetooth functionality in the near future, which will make it even more versatile.

Here’s a list of devices that are compatible with muOS:

    • RG35XX Plus, RG35XX +, RG35XX H, RG35XX SP, RG28XX
    • RG40XX V, RG40XX H, RG Cube XX

If you’re interested in exploring muOS and want to enhance your handheld’s gaming experience with better performance and a customizable interface, be sure to check out my detailed guide on installing and using muOS.

KNULLI: A Blend of Performance, Style, and Outstanding PortMaster Support

Let's dive into KNULLI, a custom firmware designed to elevate your retro gaming handheld experience. If you’re looking for something that combines outstanding performance with sleek aesthetics, KNULLI could be your ideal choice. This firmware, a fork of Batocera, is specifically tailored to support Portmaster games, using the default Ext4 system format to ensure smooth compatibility and access to an extensive library of Port games.

What truly sets KNULLI apart is its elegant user interface and impressively fast boot times. The design is not only visually appealing but also optimized for smooth operation, providing an efficient and enjoyable gaming experience. Beyond its sleek appearance, KNULLI offers customization options that let you personalize Emulation Station themes. This means you can tweak the look and feel of your device to reflect your unique style, making your retro gaming setup truly your own.
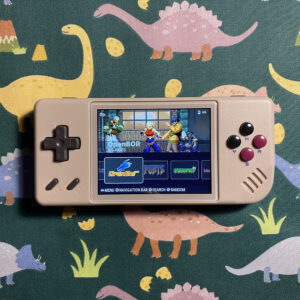
Anbernic RG28XX running Knulli

Anbernic RG28XX running Knulli

However, there are some technical considerations. The default Ext4 format, while excellent for performance, can be less user-friendly for managing files on Windows or macOS since Ext4 is natively supported only on Linux. For Windows PC users, file management typically requires network file sharing, which may result in slower transfer speeds and time-consuming processes. Alternatively, you can reformat to ExFAT for better compatibility with Windows and macOS, simplifying file management.

Keep in mind, though, that switching to ExFAT may have drawbacks. Some Portmaster games, like Stardew Valley, may encounter issues with saving progress, and overall performance might be slightly reduced, including slower boot times compared to Ext4. These factors are worth considering when choosing KNULLI as your firmware.

Whether you’re new to retro gaming or a seasoned enthusiast, KNULLI’s blend of style, performance, and customization options offers a truly elevated experience, making it a fantastic choice for your retro handheld device.

Here’s a quick look at KNULLI's supported devices:

    • Anbernic RG35XX Plus, RG35XX +, RG35XX H, RG35XX SP, RG28XX, RG40XX V, RG40XX H, RG Cube XX
    • Trimui Smart Pro, Trimui Brick

If you’re ready to jump in and try out KNULLI, you can follow our full installation and usage guide. It’ll help you get everything set up and running with ease, so you can start enjoying all that this firmware has to offer.

ROCKNIX: Broad Compatibility Meets Performance and Flexibility

ROCKNIX is a robust and versatile operating system designed to elevate your retro gaming experience, offering seamless performance and compatibility with a wide range of devices. As a fork of the now-retired JELOS firmware, ROCKNIX ensures smooth operation across numerous retro gaming systems, from PS1 to N64 and PSP, allowing your handheld to handle these classics effortlessly.

One of ROCKNIX's standout features is its exceptional device compatibility. Whether you’re using an Anbernic device, Powkiddy console, Retroid Pocket, or niche models like the Magicx XU Mini M, ROCKNIX supports a diverse array of handhelds, making it a go-to choice for gamers with varied collections or those looking to explore new devices. Its user-friendly interface enhances the experience further, allowing for easy navigation through your game library, settings, and emulators. With customization options for themes and performance tuning, ROCKNIX empowers you to tailor your device's look and functionality to your liking.

Similar to Knulli custom firmware, ROCKNIX is stored on an Ext4 partition, natively supported by Linux but not readable on Windows. This means adding games directly to the primary Ext4 partition from a Windows system is currently not possible. However, for devices with two SD card slots, ROCKNIX provides a practical solution. The second SD card can be formatted as FAT32, or exFAT, and ROCKNIX will automatically detect it during boot, making it available for game storage.

If you do not use any Linux PC or laptop, it’s recommended to use the first slot for the ROCKNIX system and the second slot for game storage to ensure optimal functionality. Similar to the ArkOS dual-card setup, a key advantage of this dual SD card setup is that your game storage and save files remain separate from the system. This separation means that if you encounter issues with ROCKNIX, such as a crash or failure to boot, your game card remains intact. Simply reinstall a fresh ROCKNIX firmware on the first SD card and reinsert your game card into the second slot to quickly resume gaming with all your save data preserved.

Another benefit of the dual-card setup, as mentioned in the ArkOS dual-card configuration, is the ability to switch your dedicated game card across different ROCKNIX-based handheld devices. This feature adds incredible flexibility, allowing you to effortlessly transfer your game library between devices with a simple plug-and-play approach.

RockNix Supported Devices:

    • Anbernic: RG353P/M/V/VS/PS, RG503, RG ARC-D/S, RG351P/M/V, RG552
    • Powkiddy: RGB10X, V10, RGB10, RGB10 Max 3 Pro, X55, RK2023, RGB30, RGB20SX, RGB20 Pro
    • Magicx: XU Mini M
    • Retroid Pocket: Pocket 5, Pocket Mini
    • Game Console/DataFrog: R33S, R35S, R36S

While ROCKNIX excels in dual-slot devices, it may not be the best option for handhelds with only one SD card slot due to its reliance on the Ext4 format. However, with its wide compatibility, user-friendly interface, extensive customization options, and reliable performance, ROCKNIX is a top choice for your retro gaming handhelds, especially those with dual SD card setups. If you want to get the most out of RockNix, check out my guide for detailed instructions on how to install and set it up for your specific device.

MinUI: Simple, Efficient, and Tailored for Retro Gaming

If you’re someone who values simplicity and efficiency, MinUI could be the custom firmware you’ve been looking for. Designed with the minimalist in mind, MinUI offers a streamlined interface that prioritizes ease of use and quick access to your games. It’s perfect for gamers who want to jump straight into the action without getting bogged down by unnecessary settings or complex menus.

What I love about MinUI is how efficient it is. The Libretro frontend gives you a familiar and simple interface for managing your emulators, while the minimalist launcher ensures everything is straightforward and easy to navigate. Whether you’re switching between games or tweaking emulator settings, MinUI makes the whole experience seamless and smooth. And if you’re worried about battery life, it has automatic sleep and power-off modes, which are a huge help for longer sessions.
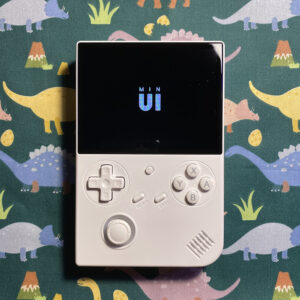
RG40XX V booting to MinUI

RG40XX V booting to MinUI

This firmware supports a wide range of retro consoles like Game Boy, NES, SNES, Sega Genesis, and PlayStation, making it a versatile choice for retro gamers. It also has a consistent in-game menu, which allows quick access to features like save states, disc swapping, and other essential emulator options. If you want a hassle-free gaming experience, MinUI is definitely worth trying.

MinUI Supported Devices:

    • Anbernic RG35XX Plus, RG35XX +, RG35XX H, RG35XX SP, RG40XX V, RG40XX H, RG Cube XX
    • TrimUI Smart Pro, TrimUI Brick, TrimUI Smart
    • Miyoo Mini Plus, A30, Miyoo Mini
    • Powkiddy RGB30, MagicX XU Mini M, M17, GKD Pixel

Want to get started with MinUI and see how it can simplify your retro gaming experience? Check out my installation and usage guide for detailed instructions.

OnionOS: A Game Changer for Miyoo Mini Devices

Now, let’s talk about OnionOS, which is tailored specifically for Miyoo Mini and Mini Plus handhelds. If you’ve been using a Miyoo Mini for a while, or just picked one up, OnionOS is a must-try. It’s designed to improve functionality and enhance the overall user experience.

One of the best features of OnionOS is its customizability. It gives you the option to personalize everything—from themes to system configurations, allowing you to make your device feel truly yours. Plus, OnionOS supports over 100 retro gaming emulators, giving you access to a wide variety of classic games right at your fingertips. It even includes useful features like auto-save and resume, ensuring your progress is never lost.

Because OnionOS is actively maintained, you’ll also benefit from regular updates that improve compatibility and performance based on community feedback. Whether you’re a retro gaming veteran or a newcomer, OnionOS transforms the Miyoo Mini into a versatile and efficient retro gaming system that meets your needs.

If you’re interested in installing OnionOS on your device, be sure to check out my complete guide to get started!

GarlicOS: Unlocking More Power for Anbernic RG35XX

Next up is GarlicOS, a custom firmware for the Anbernic RG35XX series developed by Black Seraph. This firmware takes your device to the next level by expanding its functionality and enhancing performance.

GarlicOS improves emulator support through RetroArch, making it possible to run a wider range of retro gaming systems. If you enjoy playing games that rely on time-based events, you’ll appreciate the real-time clock (RTC) support in GarlicOS. Another great feature is overclocking, which allows you to boost your device’s performance and get smoother gameplay on more demanding systems. Plus, with the sleep function, you can easily pause and resume your games without losing progress, which is a real convenience during longer gaming sessions.

If you like to personalize your device, GarlicOS has you covered with options to change themes, boot logos, and system icons. It even allows video playback, expanding the RG35XX's capabilities beyond just gaming. This firmware is constantly improving thanks to an active community, so you can expect ongoing updates and tweaks.

GarlicOS is a great choice if you want to get more from your Anbernic RG35XX device, providing better performance, more customization, and an overall enhanced gaming experience. If you’re ready to dive in, check out my GarlicOS installation and usage guide to get started!

AmberELEC: Open-Source Performance for Your Retro Handheld

If you're using an Anbernic or Powkiddy device, AmberELEC might be the perfect custom firmware for you. It’s an open-source firmware that enhances the performance of your retro gaming handheld while keeping things user-friendly. AmberELEC is known for its optimized 64-bit performance, making it a solid choice for smooth emulation across a range of retro gaming systems. Whether you’re into classics like NES and SNES or want to tackle more demanding systems like PSP and Dreamcast, AmberELEC has you covered.

One of the things I appreciate about AmberELEC is its modern, intuitive interface. It comes with pre-configured settings to make your gaming experience as smooth as possible, so you can jump right in without needing to tweak every little thing. The firmware also supports RetroAchievements, which is great for anyone who enjoys unlocking achievements in their favorite retro games. Additionally, AmberELEC includes integrated scrapers for easy game metadata management and a package manager for customizing themes and settings.

The best part? AmberELEC is actively maintained by a dedicated community, which means you get regular updates and improvements. It’s compatible with multiple platforms, including Linux, Windows, and macOS, making it easy to manage your game files across devices.

AmberELEC Supported Devices:

    • Anbernic RG552, RG351P, RG351M, RG351V, RG351MP
    • Powkiddy RGB20S, Magicx XU10
    • Game Console/DataFrog R35S, R36S

If you want to give AmberELEC a try, check out our installation and usage guide for a detailed step-by-step process to get you set up and playing.

CrossMix-OS: Customization and Seamless Gameplay for TrimUI Devices

For TrimUI Smart Pro and TrimUI Brick users, CrossMix-OS offers an excellent custom firmware solution that enhances both the functionality and user experience. One of the standout features of CrossMix-OS is its support for over 100 emulators, making it a great option if you want to emulate a wide range of retro gaming systems.

What I really like about CrossMix-OS is the focus on customization. It comes with extensive options such as themes, icon packs, and background templates, so you can really make your device your own. Plus, it includes automatic save and resume for seamless gameplay, meaning you won’t have to worry about losing progress. Whether you're jumping in for a short gaming session or a longer one, this feature ensures you can always pick up right where you left off.

CrossMix-OS also simplifies the setup process with tools like automatic overlay configurations, which makes things like setting up emulators and controllers much easier. It’s a solid choice for TrimUI devices, offering an experience that’s both functional and flexible.

CrossMix-OS Supported Devices:

    • TrimUI Smart Pro, TrimUI Brick

If you're looking to install CrossMix-OS, make sure to check out my installation and usage guide for everything you need to get started.

Anbernic H700 Stock Firmware MOD: Unlock More from Your Anbernic Device

If you have an Anbernic H700 series device, like the RG35XX Plus, RG35XX H, RG40XX H, or RG40XX V, you might want to consider the Anbernic H700 Stock Firmware MOD. This is a modified version of the stock OS that enhances functionality and offers some cool new features. For example, it provides expanded storage partitions, which is especially useful if you’ve got a lot of games on your device. You’ll also get a more polished user interface, additional emulator support, and optimized performance, which can lead to smoother gameplay across the board.

The H700 Stock MOD is ideal for those who want to get more out of their Anbernic handheld without diving into full custom firmware. It’s a great option for improving your device’s performance and making it feel more personalized.

Supported Devices:

    • All H700 Anbernic retro handhelds: RG35XX Plus, RG35XX +, RG35XX H, RG35XX SP, RG40XX V, RG40XX H, RG Cube XX, RG28XX, etc

If you're ready to try the H700 Stock Firmware MOD, check out my installation and usage guide for a complete walkthrough.

Custom Firmware Installed—What’s the Next Adventure?

Now that you've reached the end of this section, you likely have a clear understanding of which custom firmware options—such as ArkOS, MuOS, Knulli, or RockNix—are compatible with your device and which one best suits your needs. You may also have successfully installed your desired custom firmware on your device. With your firmware decision made, it’s time to move on to the fun part: adding your favorite games and getting them up and running on your retro handheld, whether you’re using stock firmware or your newly installed custom firmware. Let’s dive into the next step!

Part 3 - The Next Step Is About

Adding and Playing Your Games

So, you’ve got yourself a new retro gaming handheld—congrats! You might have already noticed that these devices often come preloaded with a handful of ROMs. It’s a nice touch, sure, but if you’re like me, you’ll want to add your own games to make it truly yours. Whether it’s that one RPG you never got to finish back in the day or a platformer you can’t stop replaying, adding your favorites is what makes these handhelds so special.

Maybe you’ve even gone a step further and installed custom firmware like ArkOS, Knulli, or MuoS to unlock more features and fine-tune your experience. Now you’re staring at that fresh setup and wondering, “Okay, how do I get my games on here?” Don’t worry—I’ve got you covered.

Most stock handhelds come with a standard stock OS, and the file structure for adding games is usually straightforward. But with custom firmware, things can get a bit different. File locations, emulator setups, or even where to place your ROMs might change slightly depending on what you’re running. That said, the overall process is pretty similar across the board.

In this guide, I’ll walk you through the general steps for adding your games, whether you’re sticking with the stock OS or exploring the possibilities of custom firmware. If you’re using a specific firmware like ArkOS or Knulli, don’t worry—I’ve got you covered with detailed step-by-step instructions tailored to each one. Just follow the links below for guides specific to your favorite custom firmware.

Links to detailed guides on adding your games on: ArkOSKnullimuOSOnionOSGarlicOS, RockNix, AmberELEC

Otherwise, keep reading for a straightforward, beginner-friendly guide to get started. Let’s jump in and get your retro handheld loaded up with the games you love.

Basic Guide to Adding Content and Playing Games on Your Retro Gaming Handheld

Here’s a step-by-step guide on how to add and play your games on your newly parchased retro gaming device:

Step 1: Prepare Your Files

Let’s start with the basics: getting your game files ready. This is where you’ll gather and organize the games you want to add to your handheld.

    • Obtain ROMs: First things first—grab your own game ROMs legally from authorized sources or extract them from your physical cartridges using a cartridge reader like Retrode 2 or GBxCart RW.
    • Check the Format: Your handheld supports specific file formats like .nes, .gba, .sfc, or .iso. Take a moment to ensure your ROMs are in the right format for the emulator you plan to use.
    • Obtain BIOS files: A BIOS file is vital for retro handhelds to emulate gaming systems accurately, bridging the device's hardware and the original console's software. It ensures proper emulator functionality, enabling features like game loading, saving, and graphics rendering. Without the correct BIOS, some emulators or games may not work. BIOS files can be dumped directly from your original gaming console using a compatible flashcard or specific tools.
    • Organize Games: Trust me, you’ll thank yourself later if you organize your games by console type (e.g., NES, SNES, GBA) into separate folders. It makes navigation on your device so much easier.

Step 2: Insert the MicroSD Card

Once your games are ready, it’s time to move them onto your handheld.

    • Turn off your handheld device (this is important to avoid data corruption).
    • Remove the microSD card from the device and insert it into your computer using a card reader.

Important: If your Window PC ask you to 'Format' or 'Repair' you card when you insert it, you must select 'No' or 'Cancel' to turn off that promt. Here's I explained why you must do that.

Step 3: Transfer ROMs and BIOS files

Here’s where you’ll copy the games over.

    • On your microSD card, find the folder designated for your games—usually something like /roms or /ROMS.
    • Copy your organized ROM folders into the appropriate directories. For example:
      • Place .gba files in the "GBA" folder.
      • Put .nes files in the "NES" folder.
    • Locate the folder designated for BIOS files, typically named like /bios or /BIOS or /systems and transfer your BIOS files into it.
    • When you’re done, eject the microSD card safely from your computer to avoid file corruption.

Step 4: Insert the MicroSD Card Back

    • Place the microSD card back into your handheld device.
    • Power on your device, and you’re almost ready to play!

Step 5: Load and Play Your Game via RetroArch or Stand-alone Emulators

Now comes the fun part—loading up your games.

    • Navigate to the menu where it's labeled as emulators/consoles, contents, game Roms or RA games on your device.
    • Select the console you’re emulating (e.g., NES for .nes files).
    • Browse the game list and pick the game you want to play.
    • Select the game and press "Start" or "A" button to load it.

RetroArch vs Stand-alone Emulators

In the last step about launching and playing your games, I mentioned both RetroArch and standalone emulators. But what exactly are they, and how do they let you run your games?

RetroArch: Your All-in-One Solution

RetroArch is like your ultimate gaming buddy! It’s a free, open-source platform where you and I can dive into retro gaming and relive our favorite classics. What makes RetroArch special is its unified interface, which allows you to play games across multiple platforms using "cores"—plugins that emulate specific systems.

RetroArch truly shines with older systems like the NES, SNES, and GBA. It even handles more advanced systems like the PS1, N64, and Dreamcast remarkably well. With its wide-ranging compatibility and streamlined interface, RetroArch is a go-to tool for retro gaming enthusiasts.

Now, let’s talk about the magic behind it: RetroArch cores.

Cores are the heart of RetroArch. They’re modular plugins that allow the platform to emulate different gaming systems. Each core is like a mini-emulator tailored to a specific console, arcade system, or gaming engine. For instance:

    • Snes9x: Perfect for playing Super Nintendo (SNES) games.
    • mGBA: Excellent core for Game Boy Advance (GBA) games.
    • PCSX ReARMed: A fast core for PS1 games, optimized for low-power devices.
    • Genesis Plus GX: For Sega Genesis/Mega Drive, Sega Master System, and Game Gear games.

When you load a game in RetroArch, the appropriate core takes over, making the game playable. This modular design lets you and me pick and choose the cores we need, keeping things lightweight and efficient.

The flexibility of RetroArch, combined with its powerful cores, makes it an indispensable tool for anyone passionate about retro gaming! 🎮

Standalone Emulators: Specialized Powerhouses

For modern and demanding systems like the PSP, Nintendo DS, Sega Saturn, or GameCube, standalone emulators are the real MVPs. These emulators are designed specifically for one console, making them more optimized for performance and compatibility. They often offer advanced features and settings that RetroArch cores can't match. So, while RetroArch is fantastic for general use, standalone emulators are better suited for high-performance gaming.

The Best of Both Worlds with Custom Firmware

Many custom firmware setups come pre-installed with RetroArch and its most useful cores, such as gpSP for GBA games and DuckStation for PS1 titles. These cores are highly efficient, giving you a seamless gaming experience.

Additionally, custom firmware often includes pre-loaded standalone emulators like PPSSPP for PSP games, Flycast for Dreamcast titles, and DraStic for Nintendo DS. These emulators excel at handling their respective systems, offering the best features and compatibility.

With this combination, you get the versatility of RetroArch for classic systems and the power of standalone emulators for modern, demanding platforms. Together, they make custom firmware setups the ultimate toolkit for retro gaming enthusiasts! 🎮

Additional Tips

Custom Firmware: Some handhelds may need custom firmware to unlock their full potential, especially for running specific games or emulators. If that’s the case for your device, don’t worry! Custom firmware setups are often designed to make things seamless, whether you’re using RetroArch or standalone emulators. If you’re ready to dive into custom firmware, check out the setup guides from the previous section to get everything up and running smoothly.

Metadata Scraping: Want your games to look polished with box art and descriptions? Tools like Skraper can help you scrape metadata for your game library. Check out my guide on scraping boxart and metadata for your game library.

Save States: Make the most of save states to jump back into your game exactly where you left off—perfect for those tricky levels or when in-game saving isn’t an option. For detailed instructions on how to use save states with your device’s stock or custom firmware, I’ve included comprehensive guides. Be sure to check them out to master saving your progress!

These links are detailed guides on saving your gaming progress on: ArkOSKnullimuOSOnionOSGarlicOS, RockNix, AmberELEC

For more detailed, custom firmware-specific tutorials, check out the links I’ve included for your handheld model or custom firmware. You’ll find everything you need to fine-tune your setup there. Keep going—you’re almost ready to dive into retro gaming bliss!

Links to step-by-step installing and using custom firmwares on your retro handhelds: ArkOSKnullimuOSOnionOSGarlicOS, RockNix, AmberELEC

All the guides written above are software installation and using guides for Linux-based retro handhelds. What about Android retro handhelds? Well, let's check it in next section.

Part 4 - Using An Android Device? Let's Read Our

Android Retro Handheld Setup Guide

Android retro handhelds, like the Anbernic RG556 and Retroid Pocket 4 Pro, are perfect for blending that nostalgic gaming vibe with the power of modern performance. These devices run on Android OS, which means not only can you run your favorite emulators, but you can also access Android games, streaming apps, and other multimedia features, all in one portable device.

Now, I know the idea of setting up your new Android retro handheld might seem overwhelming at first. But don’t worry—I’ve broken down the essentials for you. These steps will get you started with the basics, and soon enough, you’ll have your device fully customized to deliver the best gaming experience possible. If you’re looking for a more in-depth guide, feel free to check out Dino Retro's Complete Guide to Setting Up Your Android Retro Gaming Handheld for all the details.

Initial Setup

The first step is simple: power on your device and get it connected to the world. Connect to Wi-Fi, log in to your Google account, and check for any system updates. It’s always a good idea to make sure your system is up to date before you dive into anything else. If you're someone who likes to tweak performance, you can enable Developer Options for advanced settings that can give you a bit more control over your device.

Install Emulators

One of the best things about Android-based retro handhelds is the sheer number of emulators available. RetroArch is a popular choice because it supports multiple systems, but you can also download standalone emulators like Dolphin (for GameCube/Wii) or PPSSPP (for PSP). After installing your emulators, make sure to configure the cores within RetroArch for each specific system you plan to emulate. Don’t stress if this sounds complicated; I’ll walk you through it in my full guide.

Add Your Game ROMs

Next, it’s time to add your games! Legally owned ROMs can be transferred onto your device via USB or stored on a microSD game card. I always recommend organizing your ROMs into folders for easy access. Many emulators like PPSSPP or M64Plus FZ Emulator have the option to scan for metadata, so your games will display nice cover art and descriptions in the interface, making your collection look polished and easy to navigate. For more information, read the Adding Your Games section in my Android handheld guide.

Configure Controls

Now, let’s talk about controls. Depending on your handheld, you might need to customize the button mapping to make sure everything feels right. Emulators typically allow you to map the buttons to suit your device’s layout. If you prefer using a Bluetooth or USB controller for multiplayer or extra comfort, pairing those external controllers is usually a quick process through your device’s settings. Check my full details on how to configure controls on Android devices.

Optimize Performance

Once your emulators and games are set up, it's time to fine-tune your device's performance. You can adjust settings like resolution, frame skipping, and graphics rendering options such as Vulkan or OpenGL. These tweaks can help smooth out gameplay and prevent lag. If your device has any performance modes, make sure to enable them—they’re great for ensuring a more stable gaming experience.

Customize Your Experience

This is where the fun starts! Want a personalized look for your device? You can install launchers like ES-DE, Daijisho or Pegasus, which give your handheld a more polished interface complete with box art and game metadata. You can also apply shaders and themes to create that perfect retro aesthetic that’ll take you straight back to the '90s. Don't know which Retro Gaming Front-end (launcher) to use on your Android device? Don't worry, my step-by-step Android handheld setup guide already covered everything you need.

Expand Functionality

Android handhelds are more than just for retro games. You can really expand the functionality of your device by adding streaming apps like Steam Link for modern gaming or install your favourite Android games like PUGB or Genshin Impact. Plus, don’t forget about backing up your save states to cloud storage for peace of mind. This way, your progress is always secure, even if you decide to swap devices or need to reset your handheld.

With these steps done, your Android retro gaming handheld will be set up and ready for hours of fun. You’ll have a fully optimized experience, with everything from emulator settings to custom interfaces tailored to your liking. In the next section, we’ll dive into Additional User Tips & Experiences that can help you get even more out of your device. So, stay tuned for more tips to enhance your retro gaming adventures!

Part 5 - Dont' Forget These Must-read

Additional User Tips & Experiences

Retro gaming handhelds are an awesome way to relive your favorite classic games, but getting the most out of your device requires a bit of care. Taking the right precautions can save you from headaches like lost progress, corrupted data, or even hardware issues. I’ve put together some essential tips to help you protect your device, optimize performance, and ensure you have a seamless gaming experience every time you pick up your handheld.

Avoid Using Fast Charging

It’s tempting to just plug in your handheld and let it charge as quickly as possible, but here’s the thing: most retro gaming handhelds are not designed to handle the high voltages and currents associated with fast charging. Take the Anbernic RG35XX and RG40XX series as an example—these devices only support 5V and 1.5A chargers, which means they should only be charged with chargers that don’t exceed 7.5W. Using a charger with higher wattage could overload the charging circuitry, leading to inconsistent power delivery and, in the worst case, permanent damage to your device.

On top of that, frequent fast charging can wear out your lithium-ion battery faster than normal charging would, reducing the number of charge cycles and shortening the lifespan of your handheld. And since most retro handhelds don’t have the advanced thermal management systems you’d find in modern smartphones, they’re more vulnerable to overheating. Heat is one of the biggest factors in battery degradation—it can reduce the battery’s capacity and even cause damage to important internal components like the motherboard or screen.

So, what should you do instead? I recommend sticking to low-power chargers like 5W chargers from reliable brands like Anker, PISEN, or Ugreen. These provide a safe, steady charge that won’t put unnecessary stress on your device. Also, avoid using USB-C to USB-C cables directly, as these typically support Power Delivery (PD) fast charging, which isn’t compatible with most retro handhelds. If possible, use the original USB-A to USB-C cable that came with your device or any similar alternatives that don’t support fast charging.

Another good tip: don’t charge your handheld via USB-C ports on devices like MacBooks. Those ports often deliver higher wattages than your handheld can handle, which could lead to overcharging or potential damage. By taking these small steps, you’ll help keep your retro handheld in good health and ensure it lasts for years of gaming fun!

Upgrade Your SD Card for Better Performance

If you're serious about getting the best performance from your retro gaming handheld, one of the first upgrades you should consider is replacing the stock SD card. The truth is, most stock SD cards that come with retro handhelds tend to be on the lower end of the quality scale. They often have slower read/write speeds and limited durability, which can cause a number of issues like longer loading times, potential data loss, and a higher risk of failure over time.

Upgrading to a high-quality, genuine SD card—think well-known brands like SanDisk, Samsung, or Kingston—makes a world of difference. Not only will you get faster performance, but you'll also improve game loading times and emulator responsiveness. This is especially important when emulating systems like PSP or GameCube, which require more data to be read and written quickly. These cards also have better durability, meaning they can stand up to wear and tear over time, reducing the chances of data corruption and other issues.

If you plan to expand your game library, use custom firmware, or store save states and cover art, upgrading your SD card is a great way to go. Larger storage capacities (like 64GB or 128GB) will give you the space you need, while high-quality SD cards ensure smooth operation and faster boot times, making the overall gaming experience much more enjoyable.

I recommend opting for UHS-I U3 or V30 rated SD cards for best results. These ratings ensure your card can handle high-speed transfers, making it a worthy investment for any retro gaming enthusiast looking to get the most out of their handheld.

Use a Good Branded SD Card Reader

When it comes to transferring data to your retro gaming device, the SD card reader you use plays a crucial role in the process. Sure, any old reader might work, but to ensure faster, more reliable transfers and reduce the risk of data corruption, I strongly recommend using a branded SD card reader.

Brands like SanDisk, Kingston, and Ugreen are known for producing readers that offer fast data transfer speeds, helping you move large files—like ROMs, firmware, and other game-related data—without the annoying wait times. A high-quality reader ensures that all your files transfer smoothly and are ready to use as soon as they’re copied over.

Cheap, low-quality SD card readers can introduce connection issues and electrical risks, potentially leading to corrupted files and a whole lot of frustration. In contrast, a reliable branded reader is designed to meet modern SD standards, such as UHS-I and UHS-II, and often comes with adapters for microSD cards, making it compatible with most retro handhelds.

Investing in a solid SD card reader is a simple yet effective step to make sure your file transfers are fast, safe, and efficient, keeping your gaming setup running smoothly and reducing the risk of file corruption.

By upgrading your SD card and using a high-quality card reader, you’ll not only boost your handheld’s performance but also ensure the long-term reliability of your device. These simple upgrades can make all the difference in the way you enjoy your retro games!

Fix a Low Writing Speed SD Card

If you’ve ever encountered slow write speeds on your SD card after formatting it—especially when reinstalling firmware or adding new games—you’re not alone. You might notice the writing speed drop to as low as 1-3 MB/s, even when you're using a high-speed card like Samsung U3 V30, which should typically run at 50-80 MB/s. This issue usually arises after a quick format, which only erases the file system table but leaves underlying data fragmented and still on the card. This fragmentation can mess with your card’s internal management, causing the slowdowns.

To fix this, you'll need to deep format your SD card using the SD Memory Card Formatter tool (available for both Windows and Mac). Unlike a quick format, this tool writes zeros to every sector on the card, thoroughly erasing any leftover data and resetting it to a fresh, clean state. Yes, it can take several hours, especially with larger cards, but it’s worth the wait. After performing the deep format, you’ll notice your write speeds return to normal, so you can copy new firmware and games without any issues.

Here’s another tip: try to leave 10-20% of your card’s capacity free. This helps keep the card’s speed and reliability up over time. Also, don’t forget about the quality of your SD card reader—as I mentioned earlier, using a good branded reader will ensure faster and more reliable data transfers, so your gaming experience stays smooth.

By following these steps, you’ll get your SD card working at full speed again, making it much easier to handle larger files, install custom firmware, and manage your game libraries without any slowdowns.

Don’t Repair or Format Your Card When Plugged Into a Windows PC

When you plug your retro gaming SD card into your Windows PC, you might get prompted to repair or format the card. This is common because Windows doesn’t always recognize the custom partitions or file systems used by retro handhelds—especially those running Linux-based setups. If you accidentally click “Repair” or “Format”, you could end up erasing important files, including firmware, emulator settings, and your game library. That’s a serious problem, as it could leave your handheld completely unusable until you restore everything.

So, what should you do? When these prompts pop up, don’t click "Repair" or "Format". Instead, make sure to click "Cancel" or "No". This will prevent Windows from messing with your SD card, keeping all of your important data intact. By avoiding these repair or format options, you’ll ensure your SD card remains functional and ready to keep your retro gaming system running smoothly.

If you ever need to manage your SD card, I recommend using tools that are compatible with the custom file systems on your handheld. This way, you avoid running into these issues and keep your data safe.

Always Use the Correct Port to Charge Your Retro Handheld

Many retro handheld devices, especially those from brands like Anbernic or Powkiddy, are designed with two USB-C ports. Typically, one port is labeled "DC" and is specifically meant for charging, while the other, labeled "OTG", is intended for data transfer. It’s important to use the correct port to avoid charging issues or damaging the device.

If your device has only one port, pay attention to its label. A port marked "DC" is solely for power, while one labeled "DC-OTG" supports both charging and data transfer. Always check the labeling to ensure you’re using the device properly.

Using the correct port not only ensures your retro handheld charges properly but also helps maintain the battery’s health, overall performance, and the device’s lifespan. Proper care will keep your handheld gaming experience smooth and enjoyable for years to come.

Avoid Hard Shutdowns or Resets Unless There Are No Other Options

We’ve all been there—when something’s not working, you just want to power off your handheld and start fresh. But here's a tip from me: try to avoid performing a hard shutdown or reset on your retro gaming device unless absolutely necessary.

Hard shutdowns, like holding the power button until the device turns off, or force resets, can mess with critical processes like firmware updates, saving your game, or writing data to your SD card. Doing this can lead to corrupted files, lost progress, or worse, it can even damage your device’s firmware or operating system. Not a fun situation!

When you need to turn off or restart your device, always use the proper shutdown or restart options in the menu. For example, in ArkOS, you can safely shutdown the device by pressing the START button, then select Quit => Shutdown System.

This ensures that everything is properly closed and that there’s no risk of interrupting any background tasks. Only resort to a hard shutdown if your device becomes unresponsive or frozen, and you’ve exhausted all other options. Taking this extra step will help protect your handheld and keep everything running smoothly for the long haul.

Safely Remove Your SD Card: Protect Your Data

Now, let’s talk about your SD card again. If you need to copy new games or data to your SD card, don’t rush to remove it from you retro handheld immediately. It’s crucial to make sure the device is completely powered off before you eject the card. This means waiting until the light indicator is OFF, ensuring that all processes have fully completed. If you remove your SD card while the device is still powered on or in standby mode, you risk interrupting ongoing operations, which can lead to corrupted files, data loss, or, in the worst case, damage to the SD card itself.

Also, when transferring files on your computer—whether it’s Windows or Mac—always make sure to eject the SD card safely using the operating system’s "Eject" or "Safely Remove Hardware" option. This ensures that all the files have been properly written to the card before you pull it out. Skipping this step might leave you with incomplete transfers or corrupted data, which is not something you want when you’re looking to play your games smoothly.

By following these steps, you’re not only protecting your SD card but also ensuring that your retro gaming setup remains in top shape for years of gaming fun.

If you follow these steps—avoiding hard shutdowns and safely managing your SD card—you’ll make sure your retro handheld remains reliable and your gaming experience stays smooth. Trust me, taking these small precautions will save you from a lot of frustration later on!

Don't Plug Your Game Cards into Android Phones

Here’s something I see happen way too often, and I’d hate for it to happen to you. A lot of us get our shiny new retro handheld, load up the SD card, and then think, “Hey, I’ll just plug this into my Android phone to organize files—it’ll be quick and easy!” But trust me, that “quick and easy” decision can quickly turn into a headache.

You see, Android phones don’t just quietly let you manage your SD card. They jump right in, detecting the card and creating folders like “Android,” “DCIM,” or “Music.” Sounds harmless, right? Unfortunately, it’s not. These changes can mess up the card’s structure, especially if the card has hidden Linux partitions—those are the guts of your retro handheld’s operating system. Without them, your handheld won’t even boot. Imagine staring at your device, wondering why it’s suddenly a very expensive paperweight.

And it gets worse. Some Android phones might take things further by prompting you to format the card. If you agree—maybe thinking it’s just prepping the card for use—you could end up wiping everything: your firmware, your saved games, your settings. Gone. Starting over from scratch is no fun, and it’s definitely not what you want to spend your evening doing.

So, what’s the safer option? Stick to using a computer or a device specifically meant for managing SD cards, especially if your retro handheld runs on Linux-based firmware. Use the right tools, handle the card carefully, and always eject it properly. I know it might sound like a bit of a hassle, but trust me—it’s worth it to keep your retro gaming setup running smoothly.

Avoid Battery Drain to Protect Your SD Card and Data on Android Retro Handhelds

Here’s something you definitely want to keep in mind when using your Android-based retro handheld: never let the battery drain completely. It might seem harmless to let it run low, but if your handheld shuts down because the battery is empty, it can lead to some serious issues. Specifically, your external SD card—the one that stores your games—might encounter errors. The next time you restart the device, the Android system could detect the card as corrupted and prompt you to format it. If you go through with the formatting process, all your games, saves, and progress will be wiped. Trust me, you don't want that.

I speak from experience here—this happened to me personally. One day, my handheld ran out of battery, and when I powered it back up, the system flagged my SD card as damaged and forced me to format it. The result? I lost my entire game library and all my saved progress. It was incredibly frustrating, not to mention time-consuming, to get everything back up and running again.

To avoid this headache, just keep an eye on your battery level. Charge your device before it completely runs out of power to protect your SD card and the data stored on it, or just simply turn off your Android handheld when the battery is low and charge it up later.

It might seem like a small thing, but keeping your device at a safe charge level is one of the easiest ways to prevent data loss. This simple precaution will keep your gaming experience smooth and free of interruptions, so you can focus on what really matters—playing your favorite retro games without worry.

Part 6 - Make Your Handheld Better with These

Advanced Retro Gaming Guides

Now that you’ve got the basics down, it’s time to dive deeper and explore some of the advanced features that can really take your retro gaming experience to the next level. With the right tools and configurations, you can customize your device, connect with friends, and unlock entirely new ways to enjoy your favorite classic games.

In this section, we’ll cover some of the most powerful options available for your handheld, like playing with friends via NETPLAY, tracking your progress with Retro Achievements, and enhancing your game library with bulk media scraping for cover art, descriptions, and metadata. I’ll also show you how to connect external wired or wireless controllers for multiplayer gaming, install and enjoy Port Master games, and even use cheats to tweak your gameplay experience. Plus, if you’re into fine-tuning visuals, we’ll dive into how to use shaders and overlays to really capture that perfect retro aesthetic.

Each guide below walks you through the process step by step, so click the links to detailed guides to explore these features and make your retro gaming handheld even better!

Use NETPLAY to Play Game with Your Friends

One of the best ways to enhance your retro gaming experience is by playing with friends online through NETPLAY. Whether you're teaming up for co-op adventures or battling each other in classic games, NETPLAY lets you connect with other gamers across the globe. It’s like turning your handheld into an online retro gaming hub, and trust me, it’s a ton of fun.

To set up NETPLAY, you’ll need to configure your handheld’s emulator settings, ensure you have a stable internet connection, and sometimes make sure that everyone is using the same version of the emulator. It’s not too complicated, but it does take a little bit of effort to get it right. Don’t worry—I’ve got a detailed, step-by-step guide on how to enable and use NETPLAY, so you can start playing with your friends in no time!

Connect External Wired/Wireless Controllers

If you want to level up your retro gaming experience, external controllers are a must. Whether you prefer the responsiveness of a wired controller or the freedom of wireless, connecting controllers to your handheld is a great way to improve ergonomics and make multiplayer gaming even more enjoyable.

Setting up external controllers is usually pretty straightforward, but it can vary depending on your handheld and the type of controller you’re using. You’ll typically need to pair or connect the controller through your handheld’s settings menu. Don’t worry, I’ve put together a dedicated guide that walks you through connecting both wired and wireless controllers to your device, so you can get those multiplayer sessions up and running without a hitch.

Setup Retro Archivement

If you're a fan of retro gaming and enjoy a little bit of competition or extra motivation, Retro Achievements will be a game-changer for you. It adds a modern twist to your favorite classics by introducing a reward system for completing in-game challenges. Think of it as unlocking trophies or achievements like you would on modern consoles—except this time, it's for your retro games.

Setting up Retro Achievements is straightforward. You’ll need to link your account to a platform like RetroArch and configure the compatible emulators on your device. Once it’s set up, you’ll be able to unlock achievements, track your progress, and even share your accomplishments with the gaming community. If you're ready to dive in and start unlocking those achievements, make sure to check out our comprehensive guide for all the steps you’ll need to get started.

Bulk Media & Game Metadata Scraping

Now, let’s talk about making your game library look as good as it plays. Bulk media scraping is the process of gathering important metadata, like box art, descriptions, and game ratings, for all your retro titles. This feature is perfect if you want your handheld to feel more like a fully stocked console rather than just a collection of files.

To get started, you'll need the right tools and a reliable internet connection to scrape the data. This process pulls in all the relevant information and organizes your library for a cleaner, more polished interface. It’s not only convenient but makes navigating your games much easier. For the full steps on setting up bulk media scraping, check out our detailed guide on how to make your game library shine.

Install PortMaster Games

Want to expand your library beyond the classics? Port Master is your gateway to playing classic PC ports and even indie games on your retro handheld. From DOOM to fan-favorite indie titles, Port Master lets you bring a whole new world of games to your device.

Setting up PortMaster is pretty simple—you’ll need to download the tool, transfer your game files, and then configure the settings. Once you’ve got it set up, you’ll have access to an expanded game library right at your fingertips. For a full walkthrough on installing and running PortMaster games, check out our guide for all the details you need to start playing.

Install and Use Cheats

Sometimes, you just want to have a bit of fun and make those retro games easier or more exciting. Cheats are the perfect way to spice up your gameplay—whether it's giving yourself unlimited lives, boosting your stats, or unlocking hidden features.

To use cheats on your handheld, all you need to do is load cheat files into your emulator and enable them during gameplay. It’s an easy way to change things up and enjoy your games in a new way. If you’re ready to learn how to find, install, and activate cheats for your favorite games, head over to our complete guide for everything you need to know.

Apply Shaders and Overlays

For those of you who want to customize the visual experience of your retro games, shaders and overlays are the way to go. Whether you're looking to mimic the look of an old-school CRT screen, smooth out those pixelated edges, or add some cool border effects, shaders and overlays can transform your gaming visuals into something special.

Setting them up is a breeze—you just need to download compatible shaders and tweak your emulator settings. This allows you to create a retro aesthetic that fits your personal style, giving you a more immersive experience. If you want to learn exactly how to install and use shaders and overlays, be sure to check out our step-by-step guide linked here

With these advanced features at your fingertips, you’re ready to truly customize your retro gaming experience.

Finallly - Stay Connected with Dino Retro for

More Retro Gaming Updates

Now you’ve reached the end of my ultimate guide for beginners, but the adventure doesn’t stop here! Retro gaming is constantly evolving, and this guide will evolve with it. I’ll continue to update it with the latest handheld devices, fresh custom firmware, expert tips, and practical advice to ensure your retro gaming experience keeps improving. From device recommendations to troubleshooting tips, you’ll find everything you need to make the most of your handheld. Be sure to bookmark this page and stay with us at Dino Retro for exciting updates to come!

Retro gaming handhelds are the perfect blend of nostalgia and modern convenience, letting you relive classic games and discover new ways to enjoy your favorites. Whether you’re just getting started or looking to level up your skills, Dino Retro is here to guide you every step of the way—from setting up your device to installing custom firmware and exploring advanced features.

If you have any questions or need help installing custom firmware, feel free to leave a comment—I’ll be happy to assist you! Helping fellow retro gamers is part of what makes this community so special.

And don’t forget to share this guide with your friends or other retro enthusiasts. Whether they’re just starting out or looking to enhance their gaming setup, this guide can be a helpful resource for anyone diving into the world of retro handhelds.

At Dino Retro, my mission is to keep the magic of retro gaming alive for you, one device at a time. So, stay tuned, stay retro, and let’s keep this gaming journey going together! 🎮🦕

author-avatar

About Dino Retro

Dino Retro is your one-stop destination for everything retro gaming! Whether you're a seasoned retro gamer or just starting to explore the classics, we’ve got you covered. From installing custom firmware like Knulli, ArkOS, and Rocknix to adding ROMs, cover art, and setting up cheats, our guides make it easy to level up your gaming experience. Dive into the basics or explore advanced tutorials to unlock the full potential of your handheld devices. At Dino Retro, we’re here to make your journey through gaming nostalgia seamless, exciting, and unforgettable!

Related Posts

Leave a Reply

Your email address will not be published. Required fields are marked *